How To Transfer a Domain Name To A New Registrar
Transferring a domain name to a new registrar allows you to manage your domain and related services under a provider that best fits your needs. Whether for better pricing, improved features, or convenience, the process is straightforward when the necessary steps are followed. These steps include unlocking the domain, reviewing and updating contact information, obtaining the EPP code, and starting the transfer process with the new registrar. This process also applies to domains transferred to or from our MX partners. This article outlines essential preparation steps, explains key policies such as the 60-day transfer lock, and offers tips to minimize downtime. By following this article, your domain transfer will be smooth and secure, and you can maintain full control over your domain's settings.
This article outlines essential preparation steps, explains key policies such as the 60-day transfer lock, and offers tips to minimize downtime. By following this article, your domain transfer will be smooth and secure, while you can also maintain full control over the settings of your domain.
Important:
- To ensure a smooth and delay-free transfer of your domain, please complete all four steps outlined in this article before initiating the transfer.
- Updating the registrant's contact information (name, organization, or email address) for a generic top-level domain (gTLD) can impact the transfer process since it will require additional verification after the new information is saved.
- Planning to transfer your domain name? Learn about transferring domain ownership.
Prepare Your Domain
Before you transfer your domain name to a new registrar, you’ll need to access your domain settings in your Bluehost account and complete a few important tasks. Please follow the steps below:
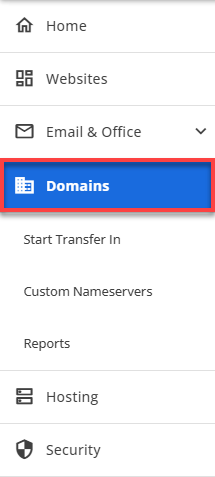
- Log in to your Bluehost Portal.
- Click the Domains tab from the side navigation to the left.
Review Contact Information
Your contact information is listed in your domain’s RDAP database, as required by ICANN. When you transfer a domain name to a new registrar, the gaining registrar uses this contact data—especially the registrant email address—to send authorization emails and verify the transfer request. To prevent delays, make sure this information is accurate and up to date.
Using an email address associated with the domain name is not encouraged. Instead, use a public and accessible email service like Gmail to ensure you receive important notifications throughout the transfer process.
If editing your contact details triggers a Change of Registrant request, we don’t support the ability to opt out of the 60-day transfer lock. We recommend waiting to update your contact details after it’s transferred, unless completely necessary.;
According to ICANN policy, a domain transfer cannot be initiated for domains registered within 60 days or 60 days of a previous transfer. Unfortunately, we can't bypass the regulation. The domain would enter a 60-day transfer lock period after a successful Change of Registrant.;
Prior updating your domain contact information make sure to consider the following:
- Domains cannot be transferred within 60 days of being registered, or transferred.
- As ICANN requires, domains cannot be transferred within 60 days of a new registration, or prior transfer.
Once you have accessed the Domains tab, please follow these steps to update your domain's contact information:
-
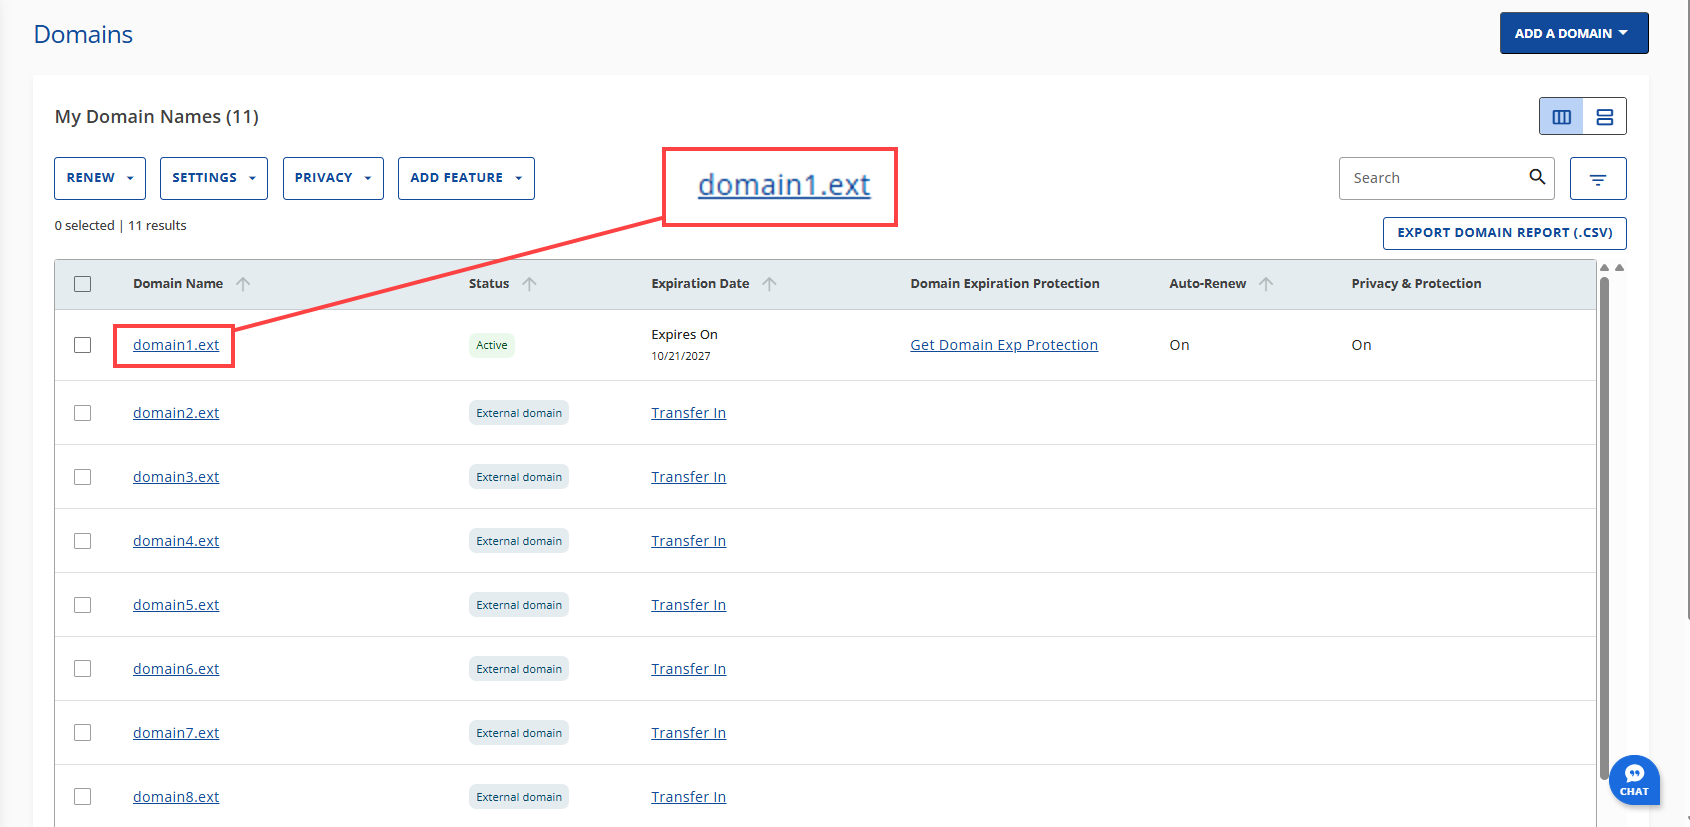
Please choose the domain name you want to manage under the My Domain Names section.
-
If you have multiple domains on your account, please click the domain name you would like to manage.
-
If you only have one domain on your account, you will be rerouted to the Domain Overview page.
Tips:
- To change the display mode of your sites on your account to Tiles mode, instruct the customer to click the Tile View Icon button.

- To change the display mode of your sites on your account to List mode, instruct the customer to click the List View Icon button.

- To change the display mode of your sites on your account to Tiles mode, instruct the customer to click the Tile View Icon button.
-
-
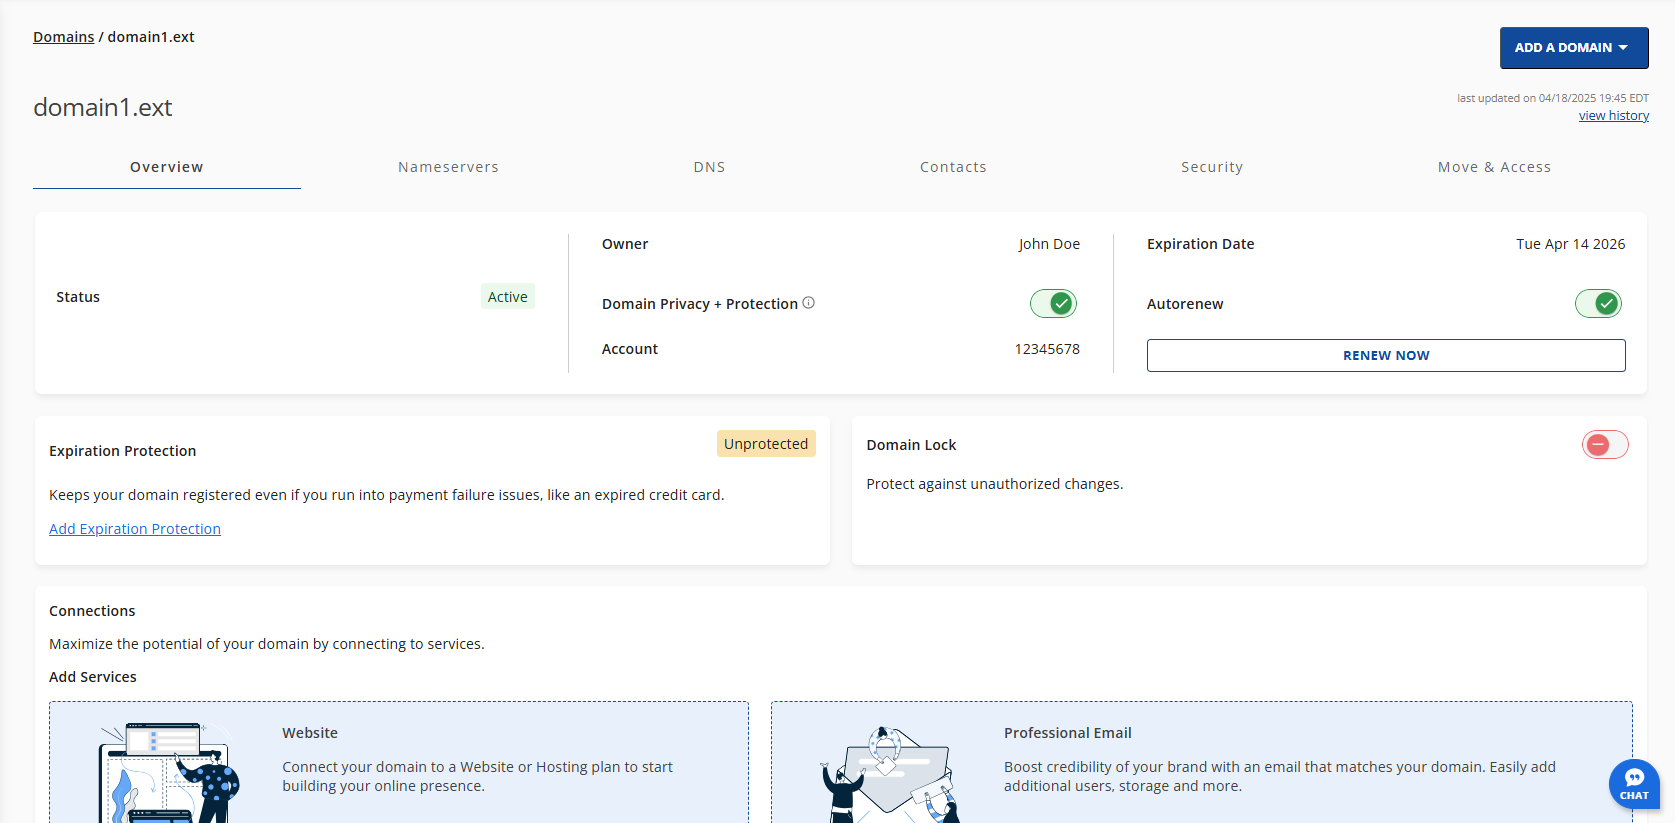
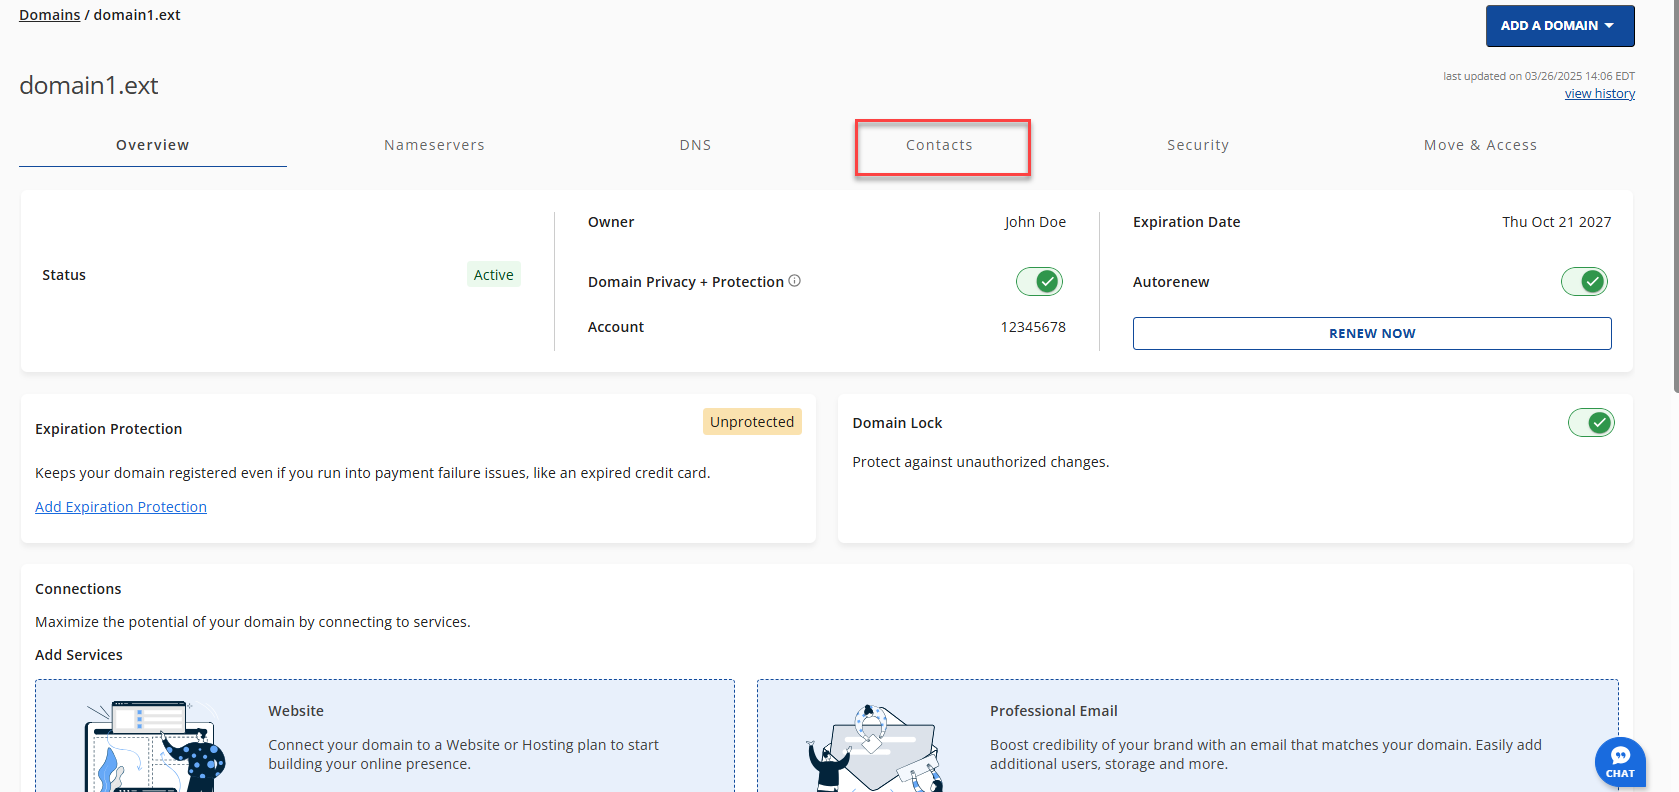
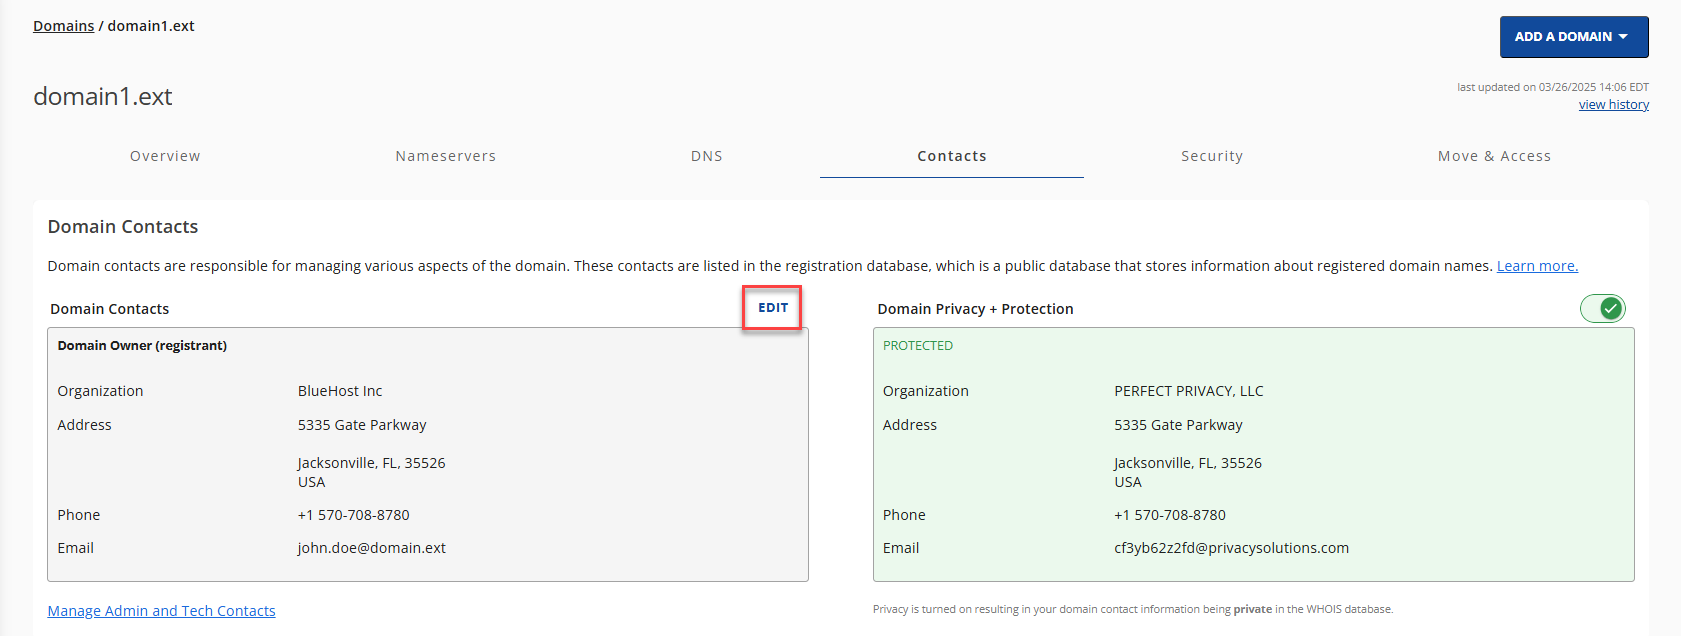
Once the Domain Overview page loads, please click the Contacts sub-navigation tab.
- Depending on the user (Owner, Admin, Tech), please follow the steps below for each user individually.
- Owner (Domain Registrant):
- Click the EDIT button.
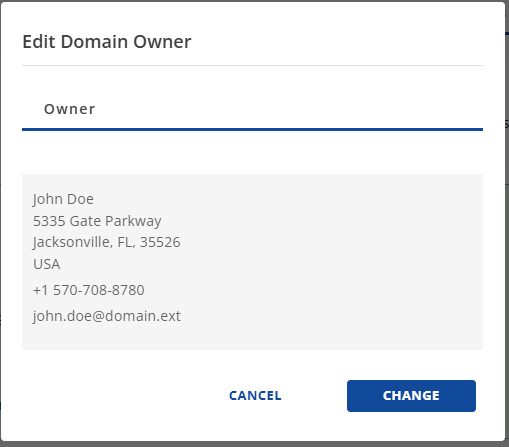
- On the Edit Domain Owner pop-up, click the CHANGE button.
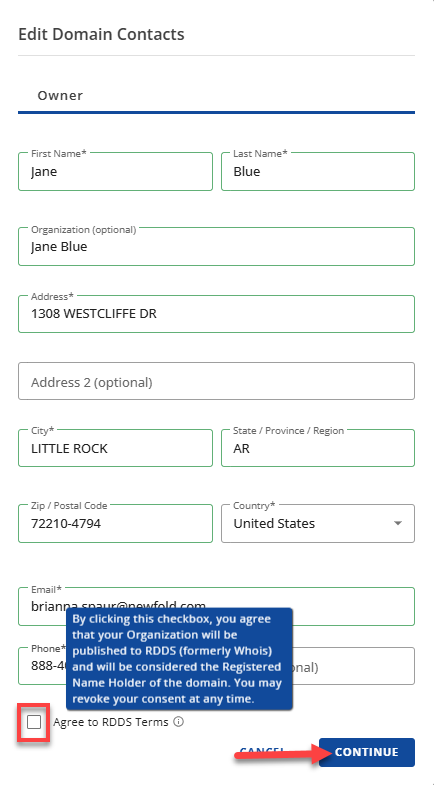
- Lastly,as ICANN requires, when you choose Organization, you will have the option of whether you prefer your Organization to be published to RDDS (formerly Whois) as the Registered Name Holder of the domain.then click the CONTINUE button.
- To publish the Organization, check the box.
- To keep it unpublished, leave the box unchecked.
Once done, you will see the banner image below.
- Click the EDIT button.
- Admin:
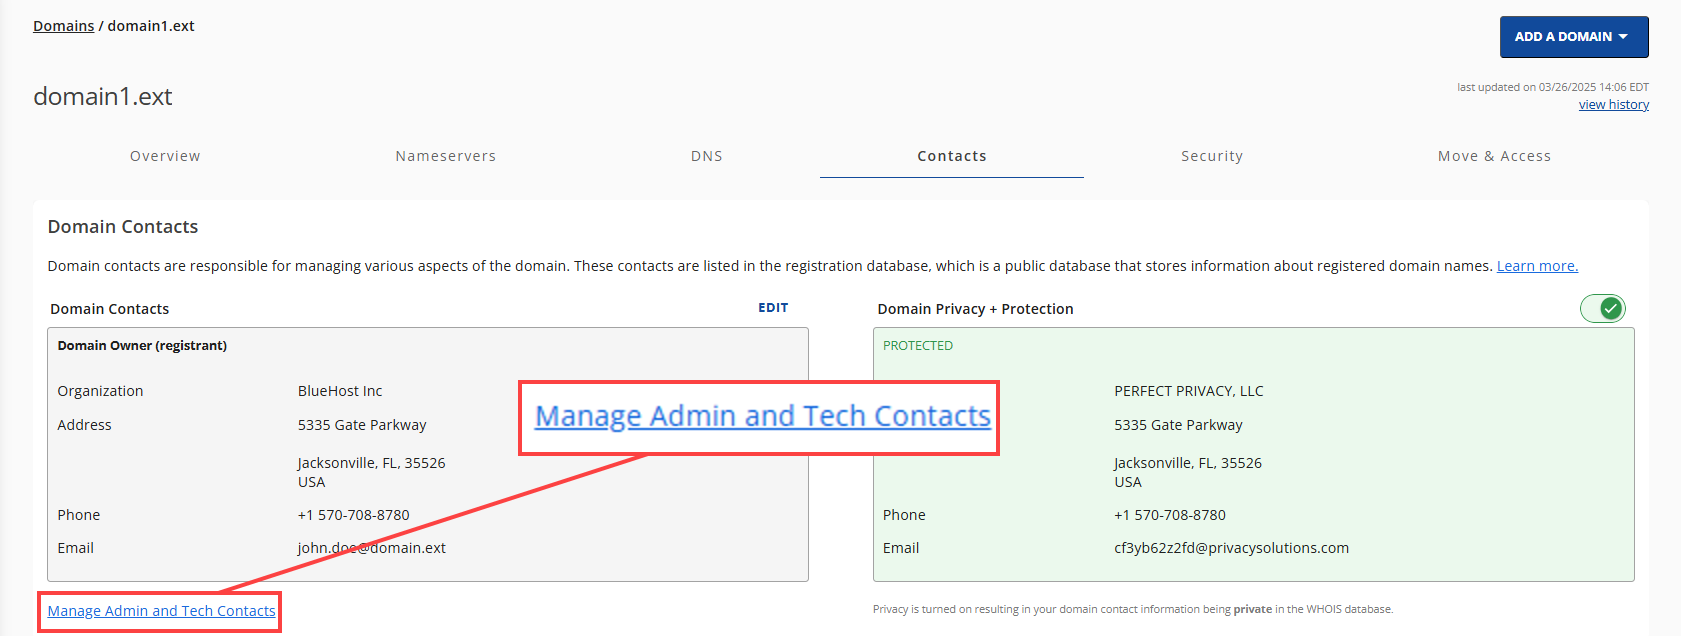
- Click the Manage Admin and Tech Contacts link.
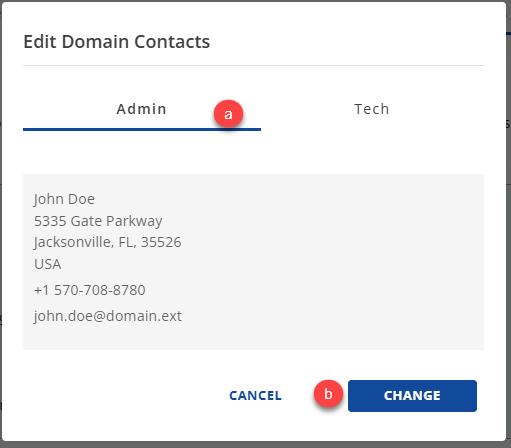
- On the Edit Domain Contacts pop-up, please follow the steps below:
- Choose the Admin tab.
- Click the Change button.
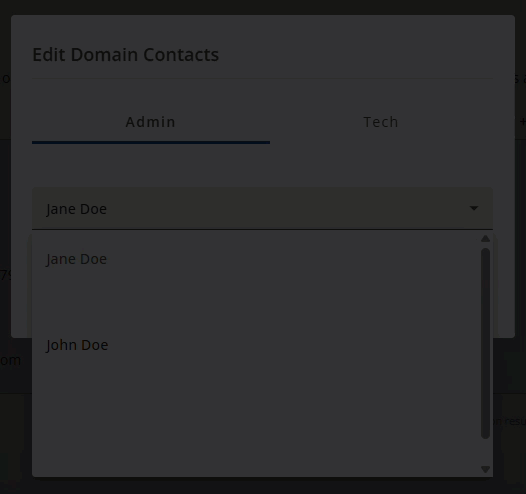
- Choose the existing user for whom you want to make an Admin under the Select User dropdown options.
Tips:
- If you want to add a different user as your Admin, please click the Add a new link in the Edit Domain Contacts pop-up.
- Please see the How to Manage Users and Roles in Account Manager article to learn more.
- Lastly, click the SAVE button.
Once done, you will see the banner image below.
- Click the Manage Admin and Tech Contacts link.
- Tech:
- Click the Manage Admin and Tech Contacts link.
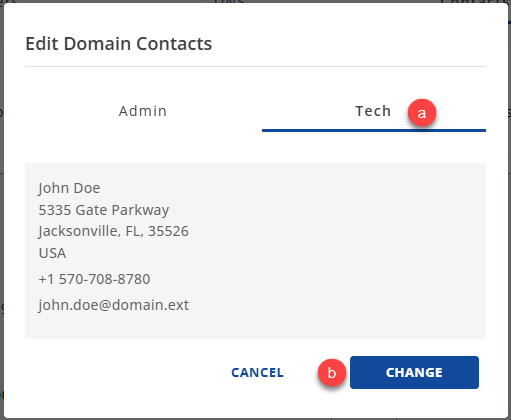
- On the Edit Domain Contacts pop-up, please follow the steps below:
- Choose the Admin tab.
- Click the Change button.
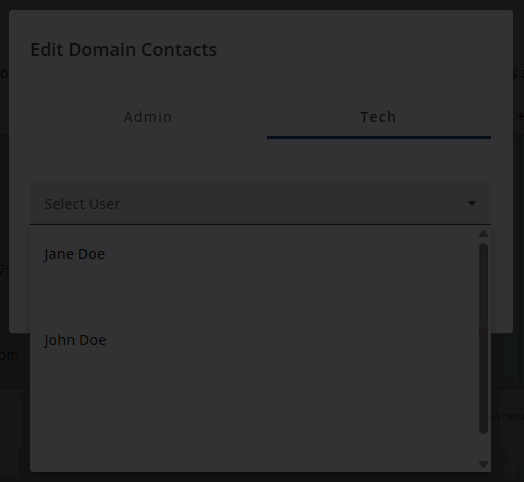
- Choose the existing user for whom you want to make an Admin under the Select User dropdown options.
Tips:
- If you want to add a different user as your Tech, please click the Add a new link in the Edit Domain Contacts pop-up.
- Please see the How to Manage Users and Roles in Account Manager article to learn more.
- Lastly, click the SAVE button. Once done, you will see the banner image below.
- Click the Manage Admin and Tech Contacts link.
- Owner (Domain Registrant):
Update Name Servers
If you’ve registered your domain with BRAND but are hosting your website elsewhere, it’s possible to keep your domain here while managing your site through another provider. However, if you’ve already moved your website files to a new host, it’s important to update your name servers before you transfer your domain name to a new registrar.
Updating your name servers early helps minimize potential downtime, as DNS changes cannot be made once the transfer process is in progress. Taking care of this step in advance ensures that your website and related services remain accessible during the transition.
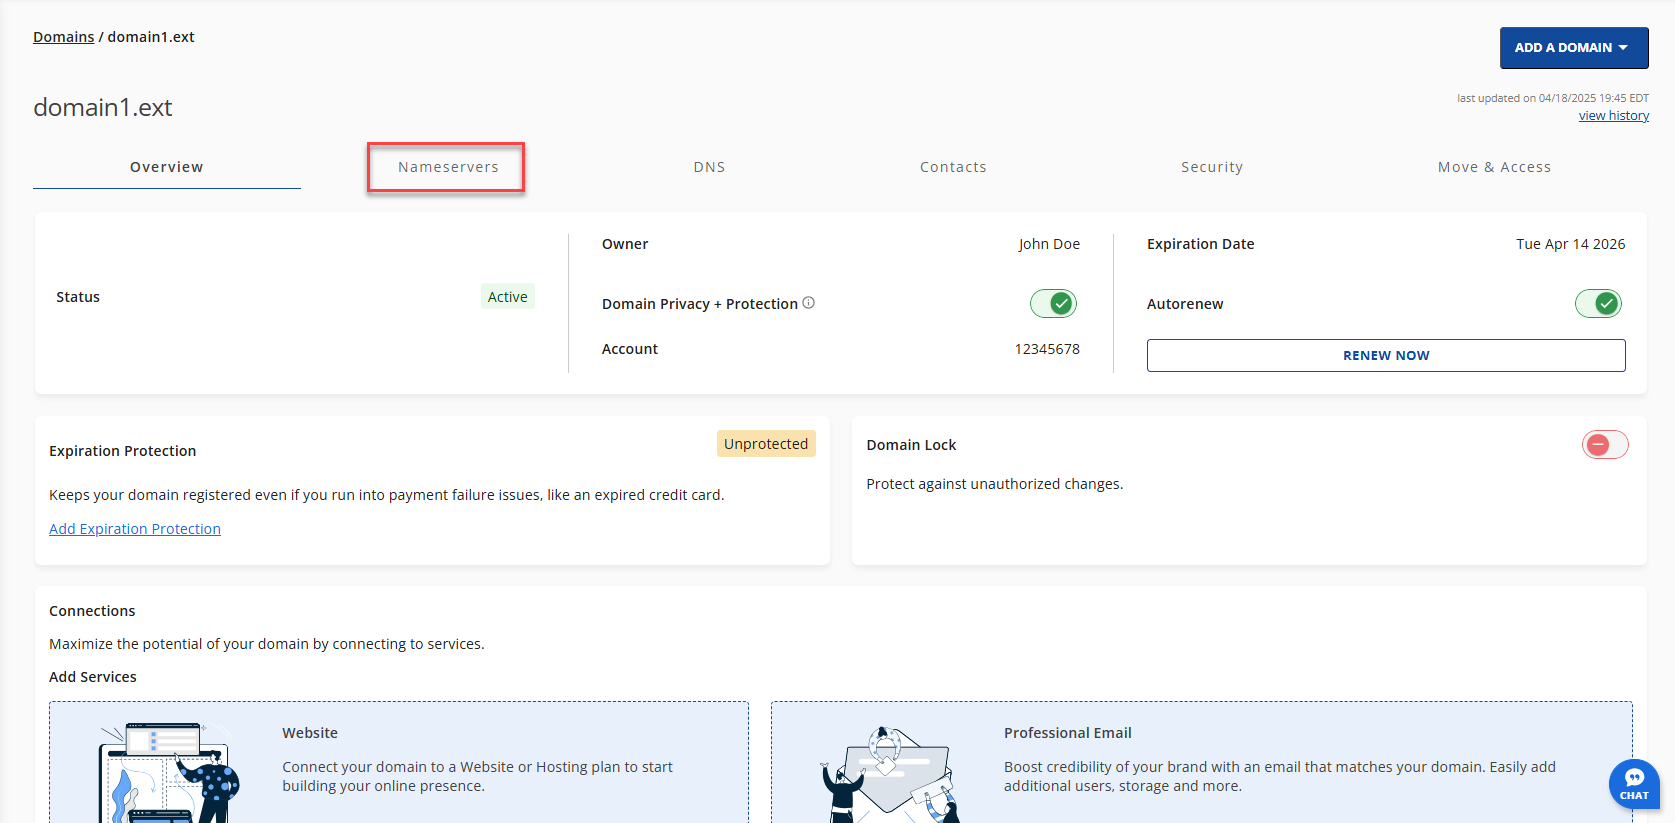
Once you have accessed the Domains tab, please follow the steps below:
- Once the Domain Overview page loads, please click the Nameservers sub-navigation tab.
- Click the CHANGE NAMESERVERS button.

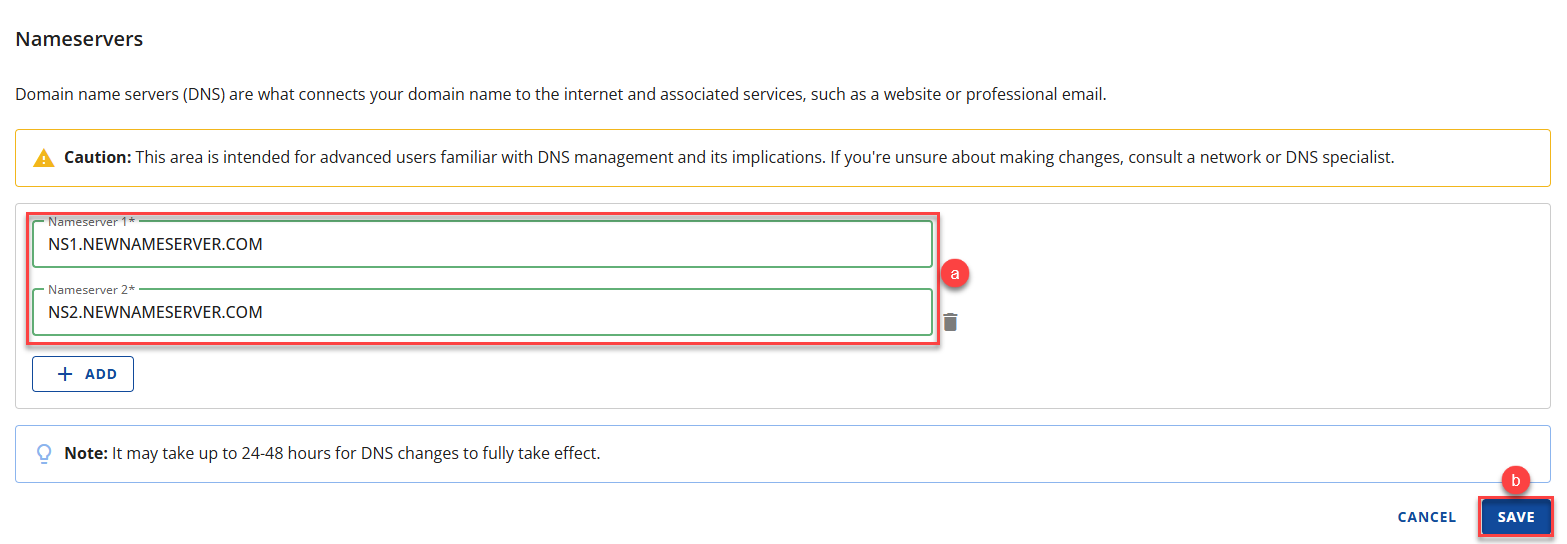
- On the Nameservers section, please follow the steps below:
- Input the new nameserver information in the Nameserver 1 and Nameserver 2 text fields.
- Lastly, click the SAVE button.
Once saved, a confirmation banner will appear at the top of the page.
Note:
- Once you save your new DNS settings, they will start to propagate. However, the changes may take 24-72 hours to be completed worldwide, as each ISP updates at a different rate.
- Your emails may not work during this time, and your web traffic will be directed to either the old or new host, depending on the visitor's ISP.
Unlock the Domain
Domains are automatically locked by default to help protect against unauthorized changes. However, to transfer your domain name to a new registrar, you’ll first need to unlock it. Unlocking your domain ensures that the transfer request can be processed without interruption.
Once you have accessed the Domains tab, please follow the steps below to unlock your domain:
- Once the Domain Overview page loads, please navigate to the Domain Lock card.
- Click the Domain Lock Toggle button to turn off the Domain Lock feature.
Once saved, a confirmation banner will appear at the top of the page, as shown in the GIF image below.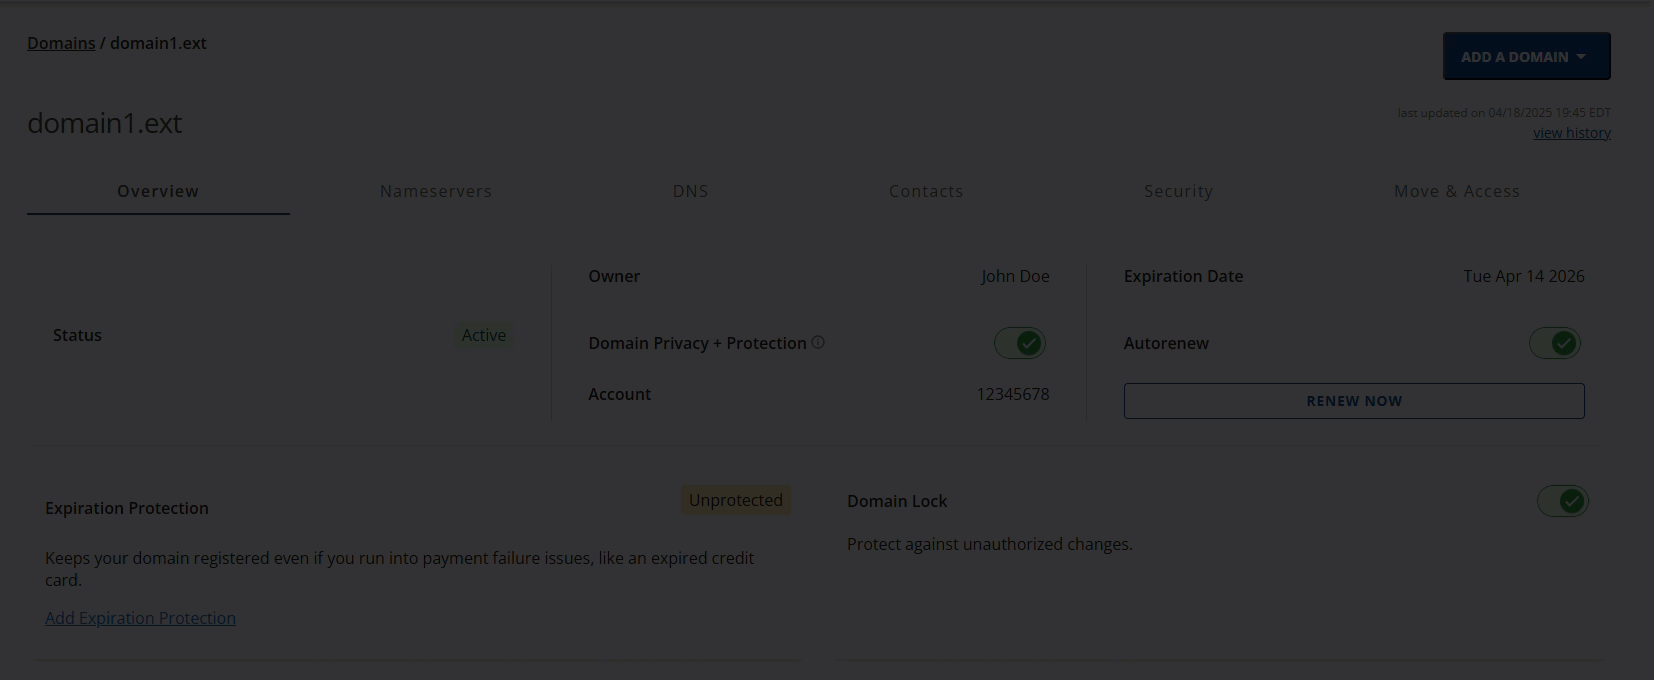
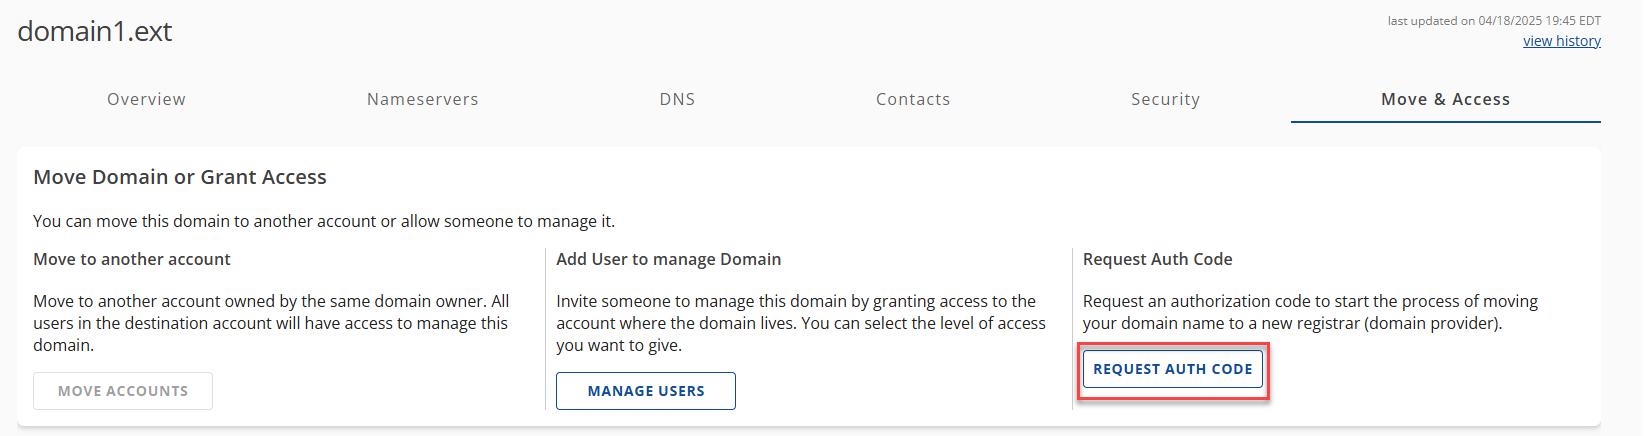
Obtain EPP Code
To transfer your domain name to a new registrar, you’ll need to obtain the EPP code—also known as the Authorization or Auth code—from your current registrar. This unique code, made up of letters, numbers, and special characters, serves as a security measure and is required by the new registrar to approve and complete the domain transfer.
Once you have accessed the Domains tab, please follow the steps below to obtain the EPP code for the domain you wish to transfer:
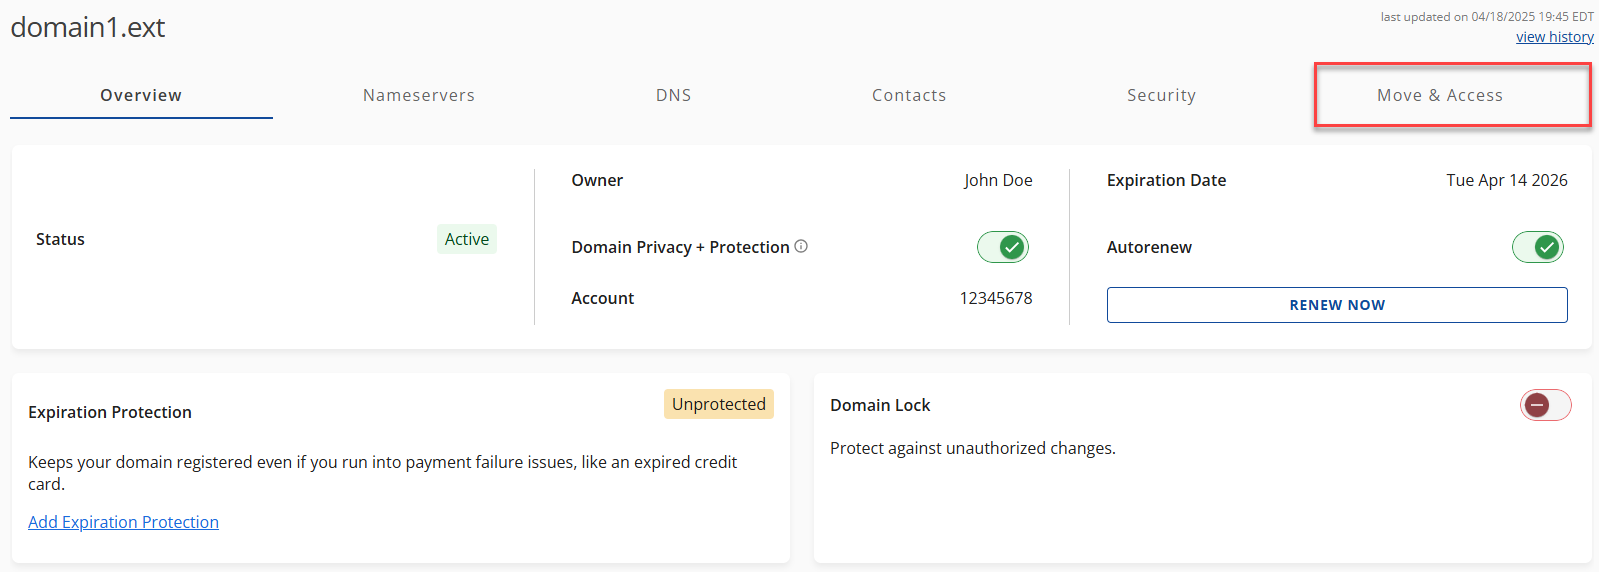
- Once the Domain Overview page loads, please click the Move & Access sub-navigation tab.
- Click on the REQUEST AUTH CODE under the Request Auth Code sub-section.
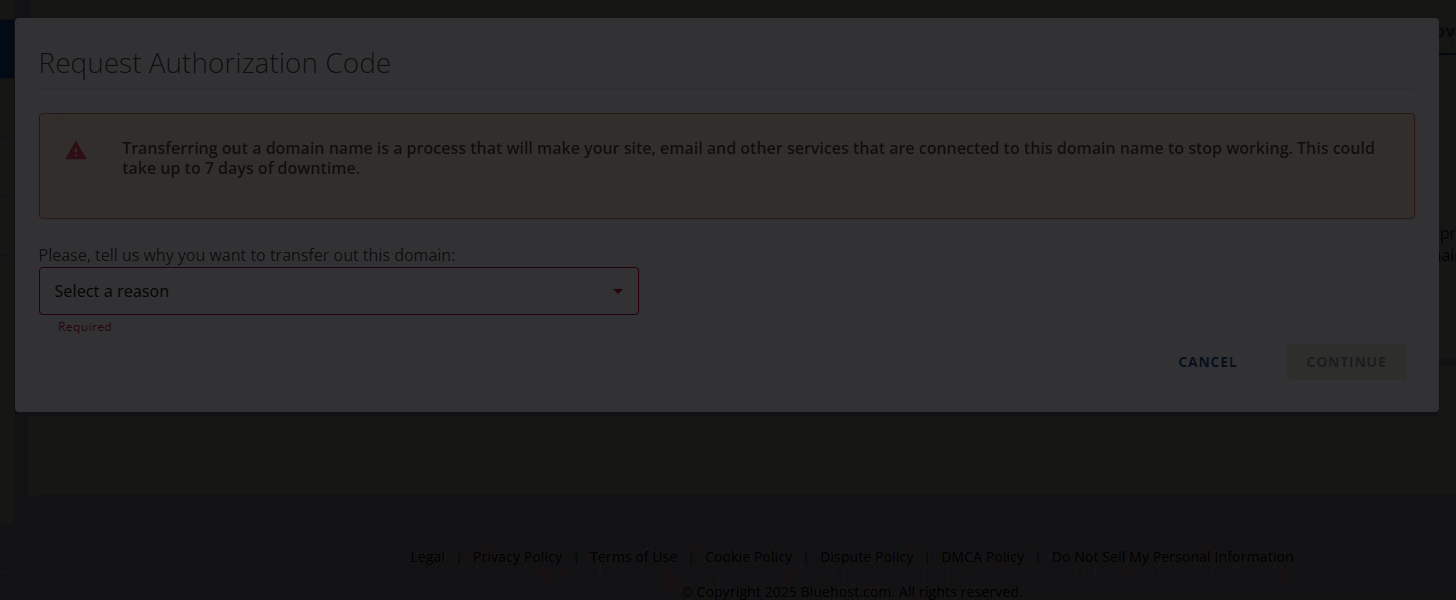
- On the Request Authorization Code pop-up, please follow the steps below:
- Choose the reason why you want to transfer out your domain from the dropdown options.
- Click the CONTINUE button.
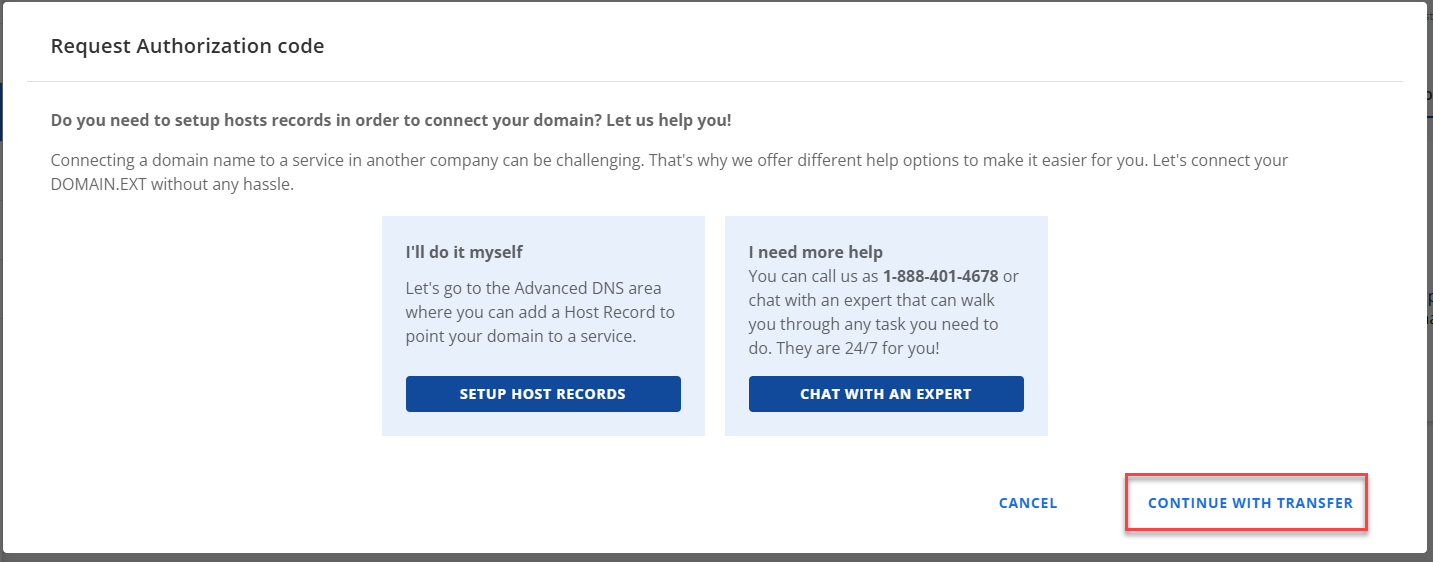
- Click the CONTINUE WITH TRANSFER option.
- Lastly, click the SEND AUTH CODE button.
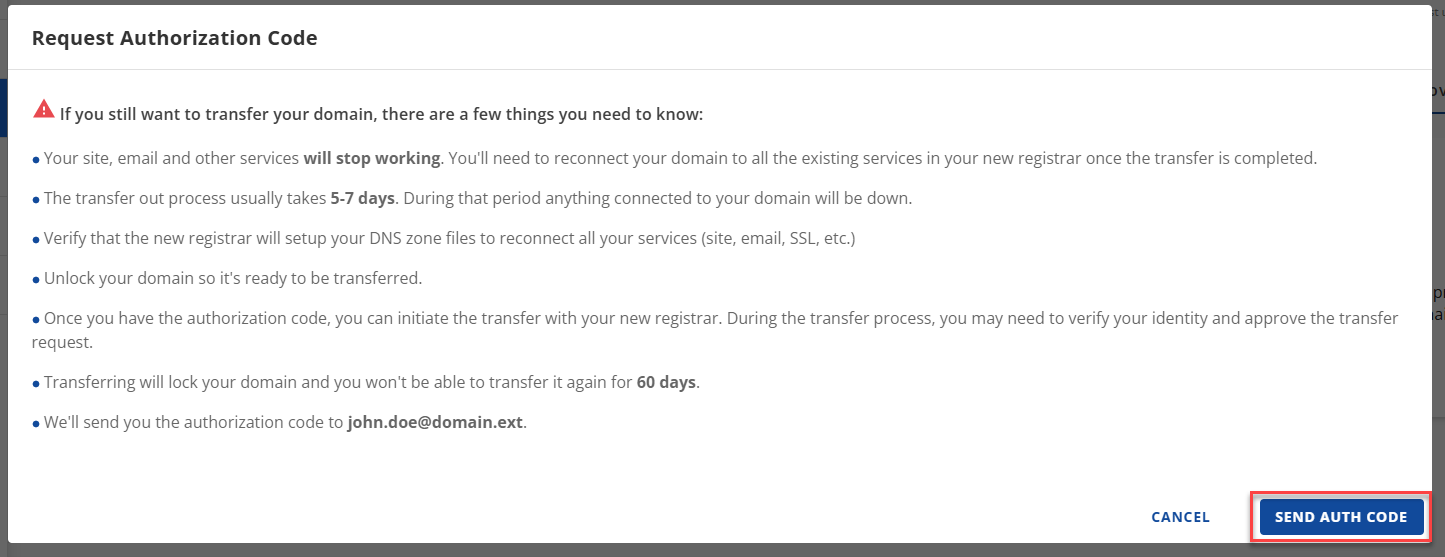
Once done, you will be rerouted to your Account Manager Home page, and a confirmation banner will appear at the top of the page. Note: Before clicking the SEND AUTH CODE button, there are a few things you need to know:
 - Your site, email, and other services will stop working. You'll need to reconnect your domain to all the existing services in your new registrar once the transfer is completed.
- As long as you have set up your domain’s DNS before initiating the domain transfer to another registrar, the domain will still propagate.
- You cannot make changes to the DNS Settings that were already set up while the domain transfer to another registrar is in progress.
- Transferring will lock your domain, and you won't be able to transfer it again in 60 days.
- The system will send the authorization key/ EPP code to the registrant's email address, not the email on file.
- Remember, the EPP Code is case- and character-specific, so if you choose to copy/paste the code, make sure there are no additional spaces at the beginning or end. Learn more about how to obtain a Transfer Authorization ( EPP ) Code.
Now you have completed the preparation process for transferring your domain.
Initiate Domain Transfer
Once you have completed the necessary steps in your Bluehost account, your domain is ready to go. To transfer your domain name to a new registrar, you’ll need to initiate the transfer process directly with the gaining registrar.
While the exact process may vary depending on the registrar, here’s a general idea of what you’ll need to do:
- Log in to your account with the gaining registrar.
- Begin the domain transfer process according to their instructions.
- Please provide them with the EPP code you copied from the Move & Access sub navigation tab.
- Follow any additional steps and/or validation they require.
Tip: Want to switch your domain to Bluehost? Follow our guide on how to easily transfer it: How to Transfer A Domain Name To Us.
Approve the Transfer
After you initiate the process to transfer your domain name to a new registrar, you'll need to approve the transfer request. A verification email sent to the registrant on file is usually the method involved in verifying your identity and confirming the transfer.
The domain transfer may take a few days to complete, so be sure to monitor your email associated with the domain you want to transfer and follow any instructions provided by your new registrar to ensure a smooth transition.
Note:
- Bluehost will send you the authorization code to the registrant email associated with the domain you want to transfer. As a security measure, it may take up to 3 days for you to receive the EPP code.
- Did your transfer fail, or are you having trouble getting it started? Check out our article on troubleshooting domain transfer for more information.
Related Articles
- Domain Transfer Status: What It Means & What You Should Do
- Domain WHOIS Update and Verification
- How to Obtain a Transfer Authorization (EPP) Code
- How to Transfer A Domain Name To Us
- How to Troubleshoot Common Domain Transfer Issues
- How to Update Contact Information
- The Different Types of Domain Locks
Summary
To successfully transfer your domain name to a new registrar from BRAND, it's important to prepare ahead of time to avoid delays or disruptions.
Start by verifying that your domain's contact information is accurate, as this will be used throughout the transfer process. Avoid making changes to registrant details right before the transfer, as this could trigger a 60-day transfer lock per ICANN policy.
Your domain must be unlocked, and you’ll need to request the EPP (Authorization) code—this unique code is required by the new registrar to authorize and complete the transfer. If you’ve already moved your site or email services, updating your name servers before initiating the transfer can help minimize downtime.
Once everything is in place, simply provide the EPP code to your new registrar and follow their instructions to complete the process.
We hope this guide has helped you better understand how to transfer a domain name to a new registrar smoothly and with confidence.
If you need further assistance, feel free to contact us via Chat or Phone:
- Chat Support - While on our website, you should see a CHAT bubble in the bottom right-hand corner of the page. Click anywhere on the bubble to begin a chat session.
- Phone Support -
- US: 888-401-4678
- International: +1 801-765-9400
You may also refer to our Knowledge Base articles to help answer common questions and guide you through various setup, configuration, and troubleshooting steps.