 ChatGPT,
  Claude,
  Gemini,
  Grok — all four for
 How to Manage DNS Records in cPanel
You can manage the DNS records for your domains that are pointed here (using our nameservers). In the Zone Editor, you can add, edit, or delete your DNS entries if you're not sure which record is which or which does what. Check out What Are DNS Records? Understanding the Basics for more information.
This article provides steps for managing DNS records in cPanel. If you need instructions for managing DNS records using the Bluehost Portal, refer to the Guide to the DNS Tab in the Bluehost Portal article.
What Are Nameservers?
Imagine the internet like a huge city. Your website has a unique address, like www.example.com, but computers understand locations using numbers. Nameservers are like the city's phonebook! When someone types your website address, their computer checks the nameservers to find the matching number (IP address). It directs them to your online presence, which is your website.
What Is DNS Management?
Think of your domain name as your website's address. DNS management is like setting up mail forwarding for that address. It directs visitors (emails and website traffic) to the right location on the internet.
How Does DNS Work?
Imagine the internet as an extensive network of houses. Each house has a unique address (an IP address), but it's hard for us to remember those numbers. DNS is like a special translator. When you type a website address (like www.example.com) into your browser, DNS looks up the real address (IP address) for that website. This allows your computer to find the right house on the internet and show you the website.
Benefits of DNS Management
DNS management offers several advantages for your online services. Let's explore them:
- Improved Reliability: Proper DNS management can help improve the reliability and accessibility of your website and online services.
- Optimized Performance: DNS configuration can help improve website response times by directing visitors to the appropriate resources.
- Enhanced Security: Certain DNS configurations and records can help support security measures and reduce exposure to some types of online threats.
- Easier Scalability: DNS management makes it easier to add and manage multiple domains and services as your needs grow.
- Simplified Administration: Centralized DNS management can help streamline tasks such as configuring subdomains, email routing, and domain redirection.
Accessing the DNS Zone Editor
- Log in to your Bluehost Portal.
- In the left-hand menu, click Hosting, then select My Plans.
- On the hosting details page, click the cPanel button.
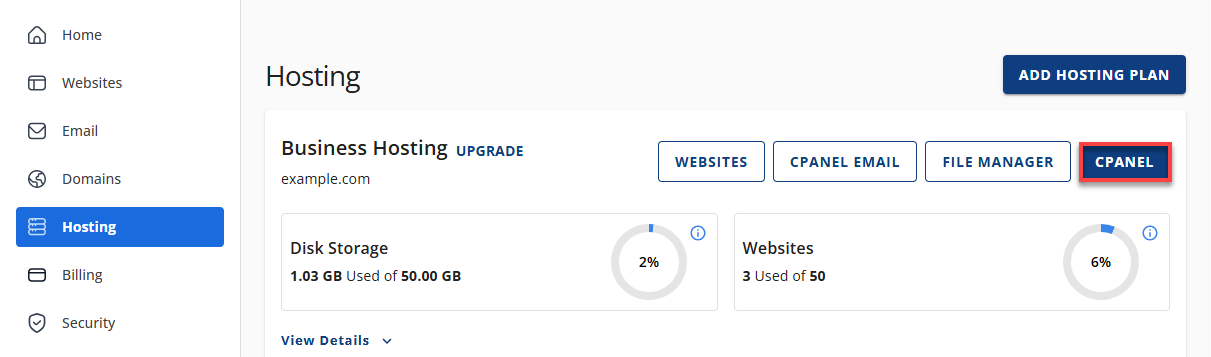
- Your cPanel will open in a new tab.
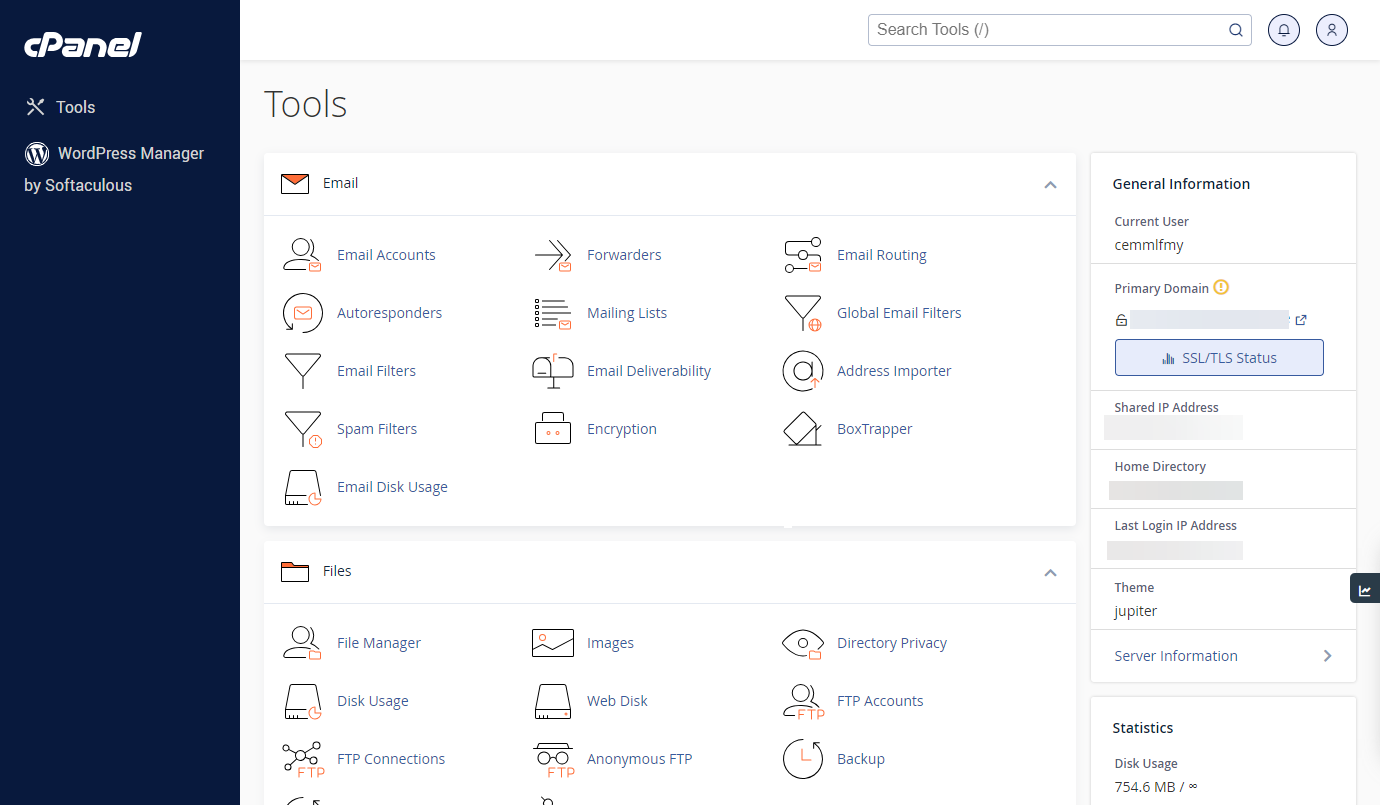
- On cPanel, scroll down. Navigate to the Domains section and tap Zone Editor.

- To add a DNS record under the Zone Editor, click the + sign for the record you want to add.
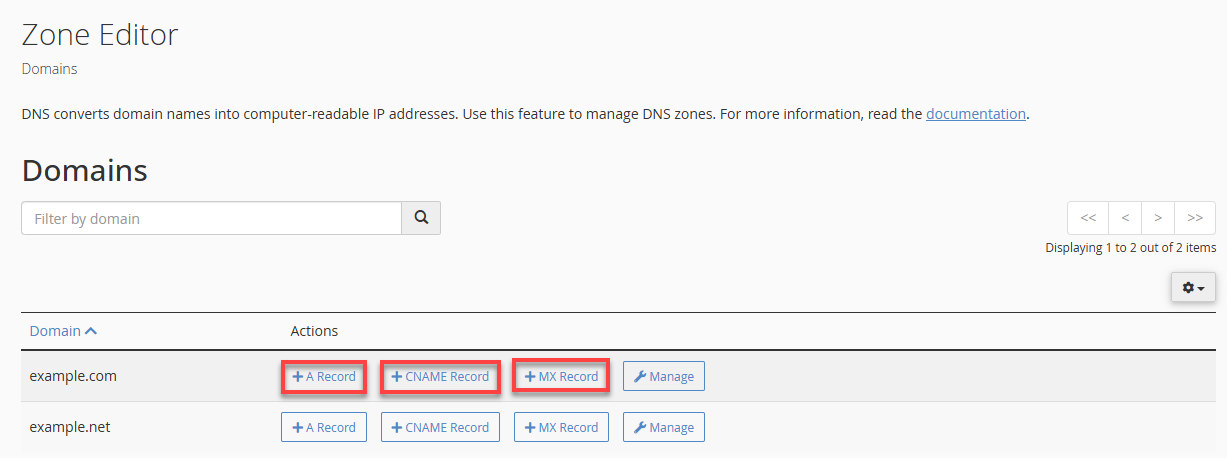
- Enter the required details, such as the Name, Address, or Destination (if applicable). Requirements vary by record type. For more information, see What Are DNS Records? Understanding the Basics.
Modifying Existing DNS Record
Follow the steps below when changing or modifying an existing record after you have accessed the DNS Zone Editor. If you aren't sure which DNS Record to update, see DNS Record Definitions for more information.
- On cPanel, scroll down. Navigate to the Domains section and tap Zone Editor.
- To update DNS Records, select the domain name you would like to access its Zone Editor and tap MANAGE.
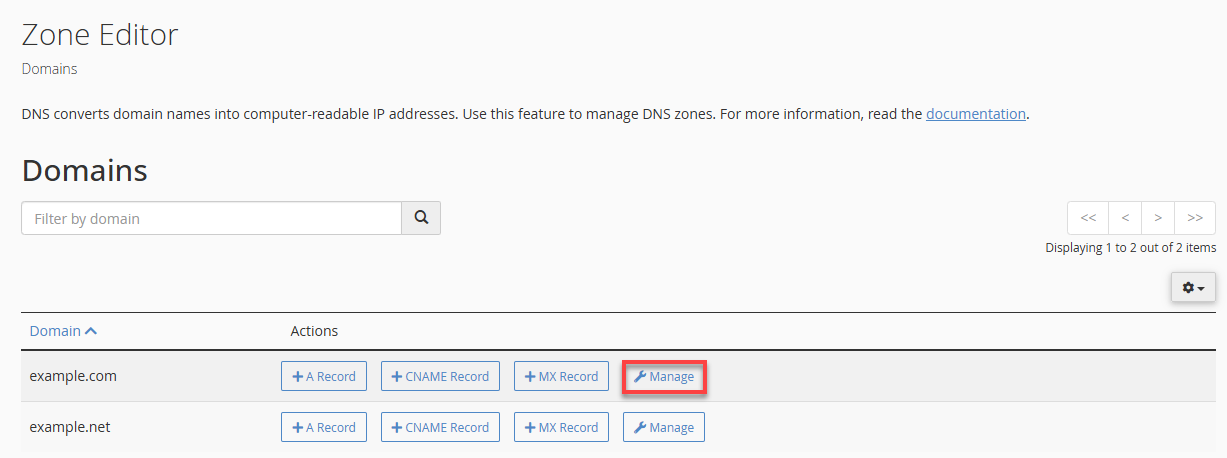
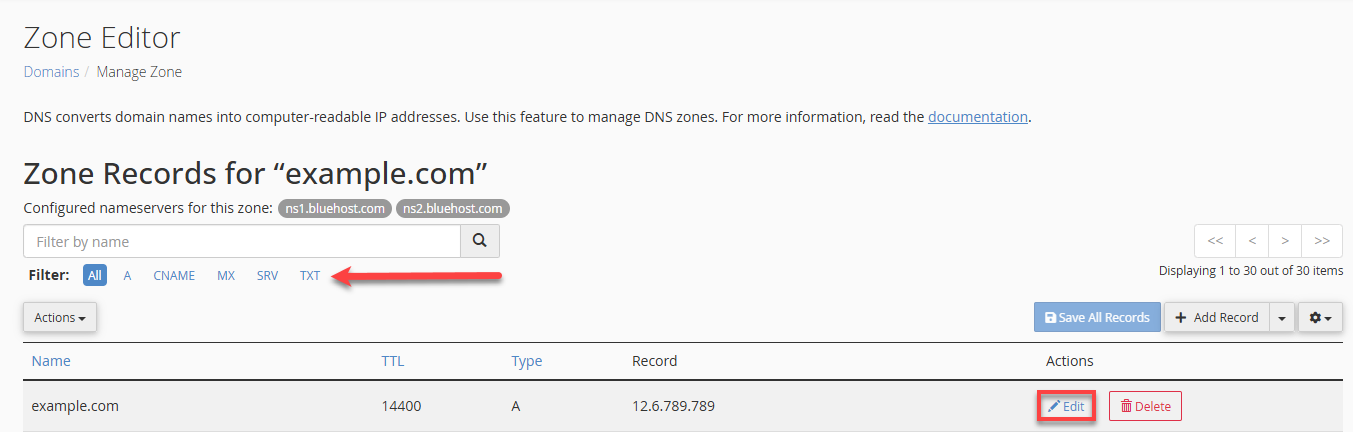
- Navigate to the Filter section and select the DNS record you're changing. To modify it, click Edit.
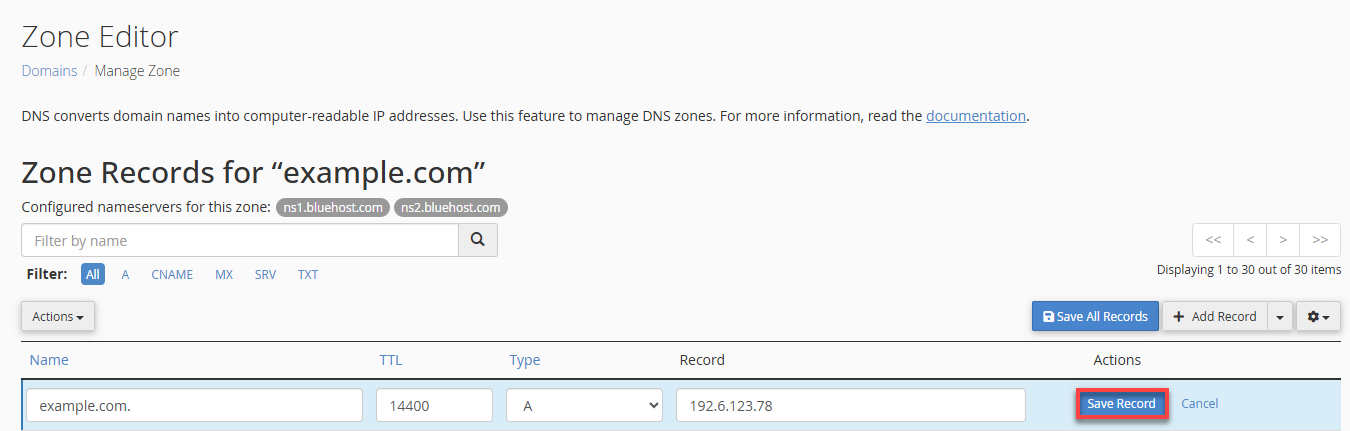
- Enter the new values, then click Save Record when finished.
Adding a New Record
Follow the steps below when adding a new record after you have accessed the DNS Zone Editor.
- Click the + Add Record button.
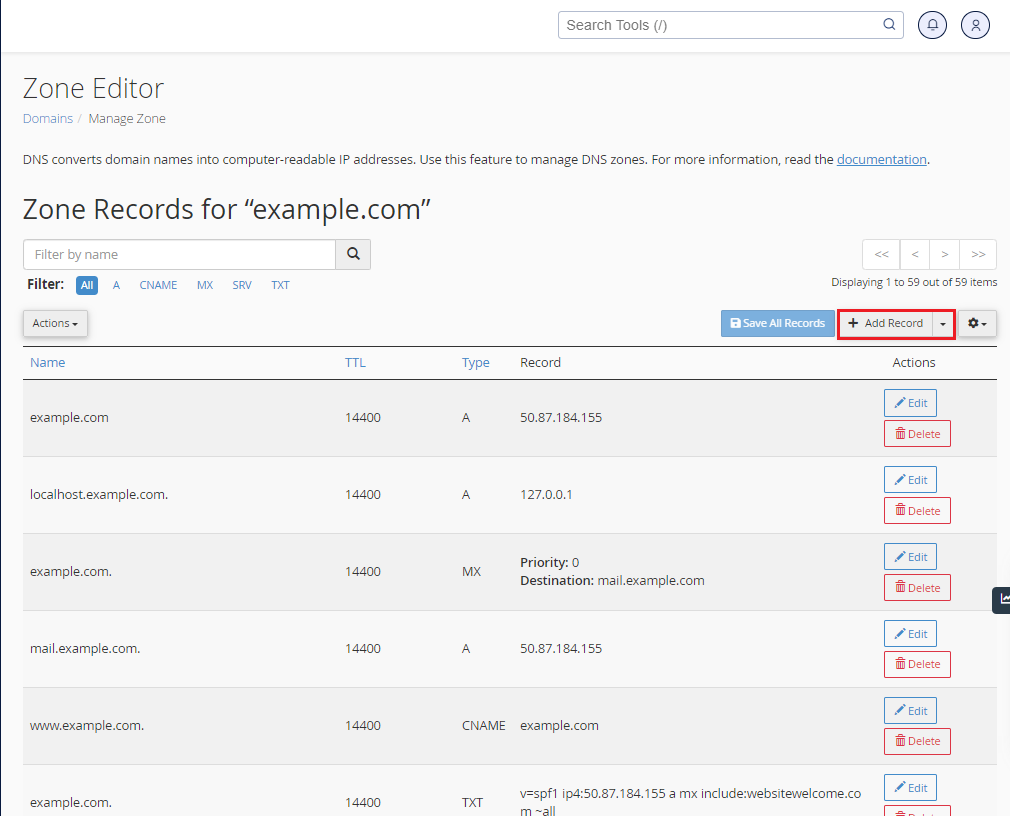
- Select the record type, then enter the required details, such as the Host/Name, Value or Points To destination, and TTL (if applicable). Requirements vary by record type. For more information, see What Are DNS Records? Understanding the Basics.
- Click Save Record when finished.
Deleting Record
Follow the steps below when deleting a record after you have accessed the DNS Zone Editor.
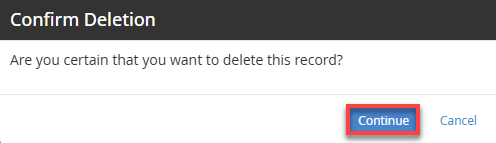
Confirm that deleting a DNS record is necessary before proceeding. Removing a host record will interrupt any services tied to your domain. For example, deleting an MX record will cause any connected email service to stop functioning.
- Find the record you wish to delete.
- Click the Delete button.
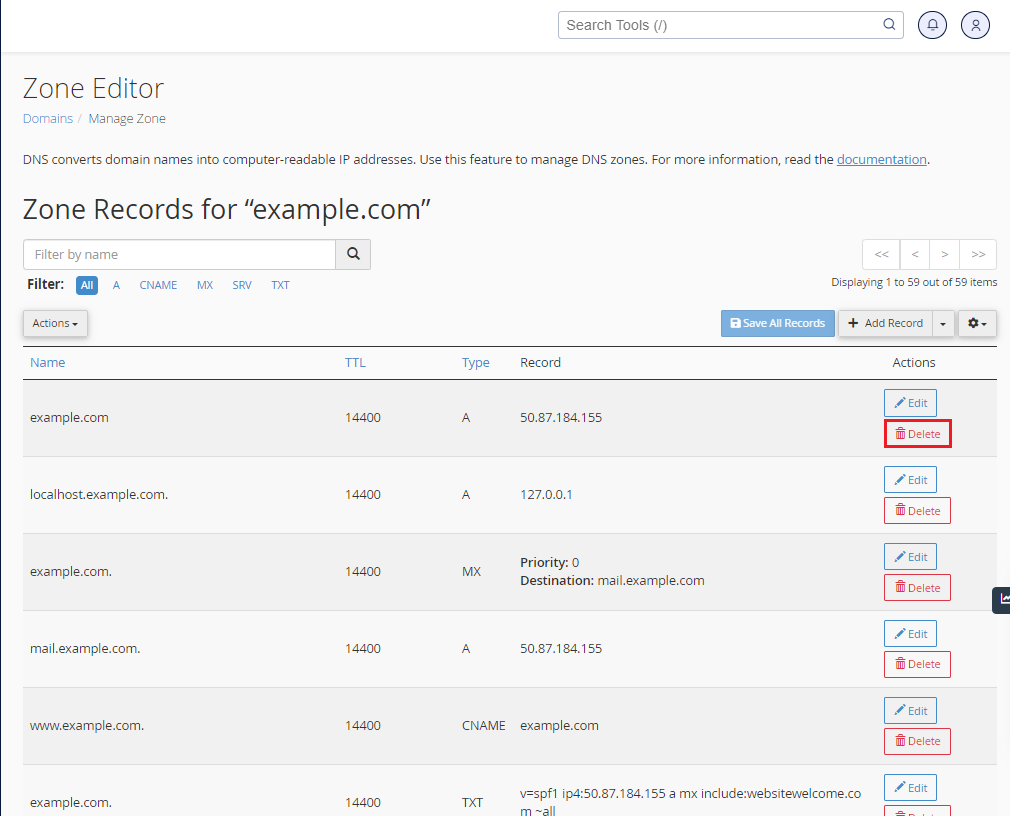
- Click Continue to confirm.
Nameserver (NS) changes can take up to 24-48 hours to propagate globally. Individual DNS record updates may take a few minutes to process but can take up to 8 hours to complete.
Summary
DNS Records help you manage a specific domain's settings (using nameservers) using various features with the Zone editor to add, modify, or delete DNS records for your domain needs. If you are looking for specific details to understand each domain record's function and purpose, view What Are DNS Records? Understanding the Basics. Then you can return to this guide for how to manage DNS Records for your domain.
If you need further assistance, Bluehost Chat Support is available 24 hours a day, 7days a week while Bluehost Phone Support is available 7 days a week from 7 am-12 midnight EST.
- Chat Support - While on our website, you should see a CHAT bubble in the bottom right-hand corner of the page. Click anywhere on the bubble to begin a chat session.
- Phone Support -
- US: 888-401-4678
- International: +1 801-765-9400
You may also refer to our Knowledge Base articles to help answer common questions and guide you through various setup, configuration, and troubleshooting steps.