How to Create a Staging Site in WordPress
A staging website is an important tool used to manage WordPress websites. It serves as a copy of your live site, giving you the ability to test updates, plugins, new features, and design changes in a secure environment without risking downtime or getting errors on the live website. By using a staging site, you can experiment freely and confidently, knowing that your audience will not see your in-progress changes. You can troubleshoot issues and ensure everything is working perfectly before deploying your changes to the live website.
In this article, we will discuss the process of creating a staging site in your WordPress dashboard.
Here are the topics discussed in this article.
Why Use a Staging Site?
Some of the benefits of a staging site include, but are not limited to:
- Staging sites help you catch errors before affecting your live website.
- Your staging website is not available to the public.
- Changes made on the staging site do not impact the live website until you're ready.
- You have control over when to deploy the changes to the live site.
How to Create a Staging Site
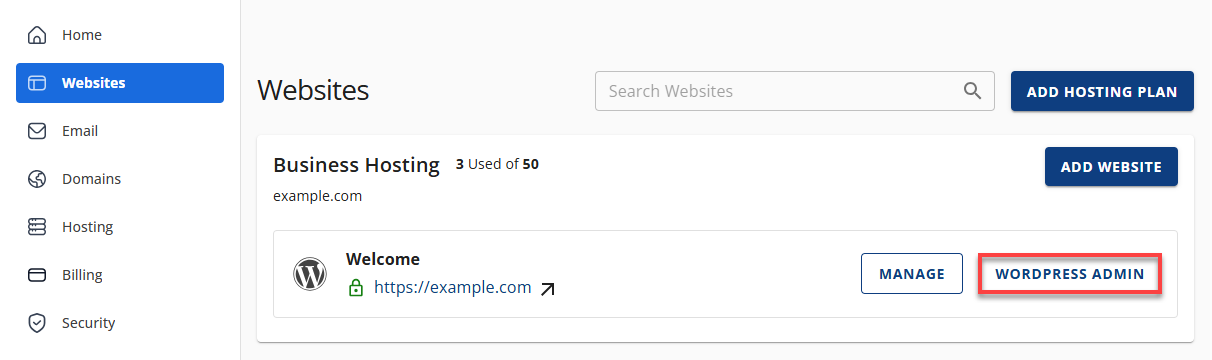
- Log in to your Bluehost Account Manager.
- In the left-hand menu, click Websites.
- Click the WORDPRESS ADMIN button located next to the website you want to manage.
- You'll be redirected to the Manage WordPress tab of the Bluehost plugin.
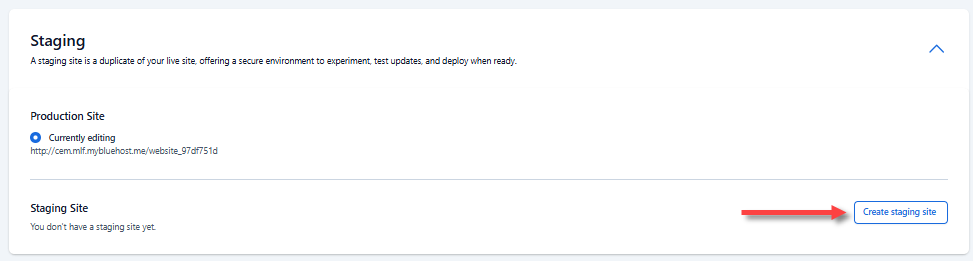
- Scroll down to the Staging Site section.
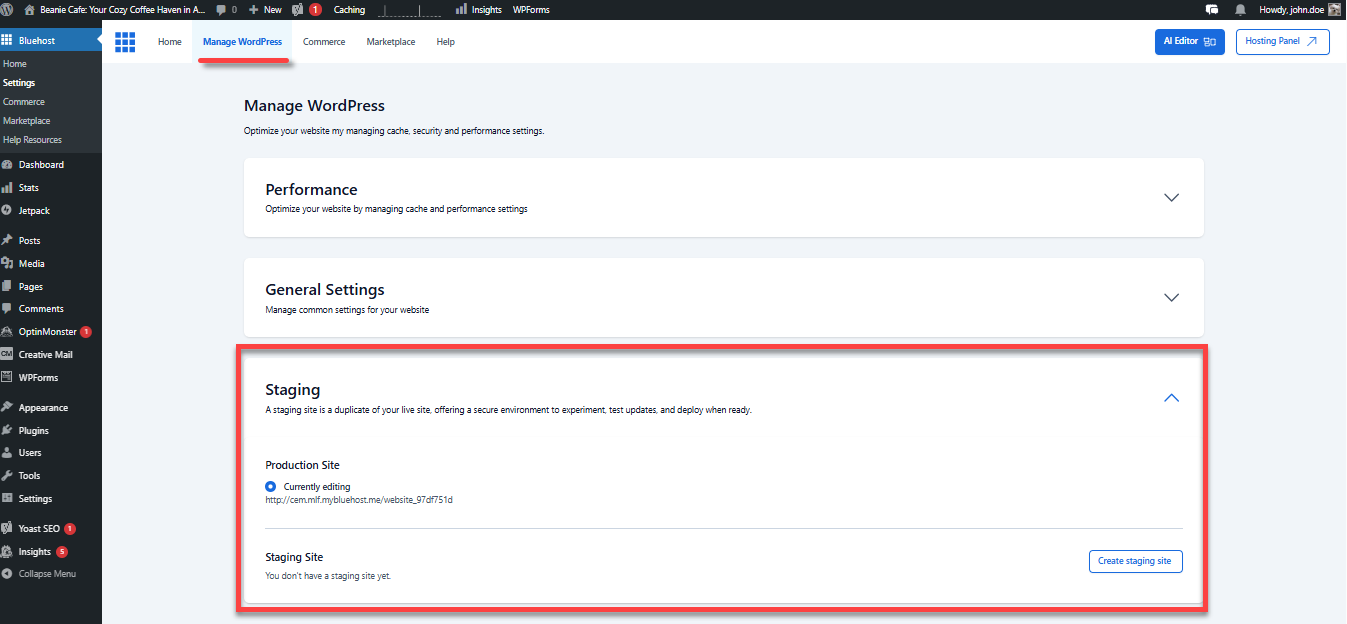
- Click the Create staging site button and give it a moment to create a staging environment.
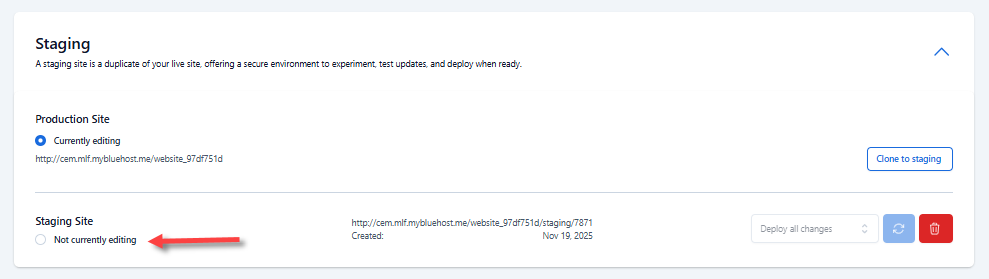
- Once created, you will see your domain, the date when the staging site was created, the Deploy menu, and the option to delete a staging site.
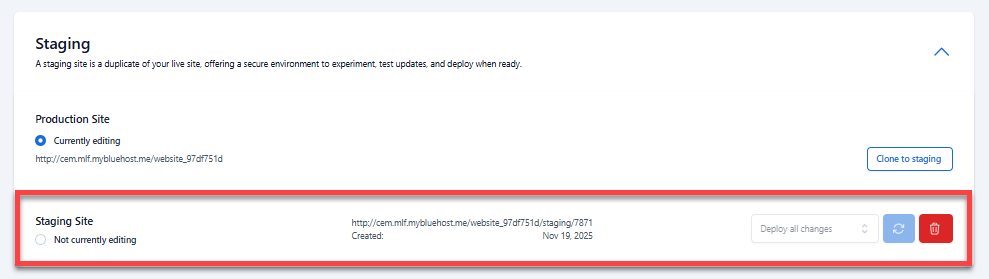
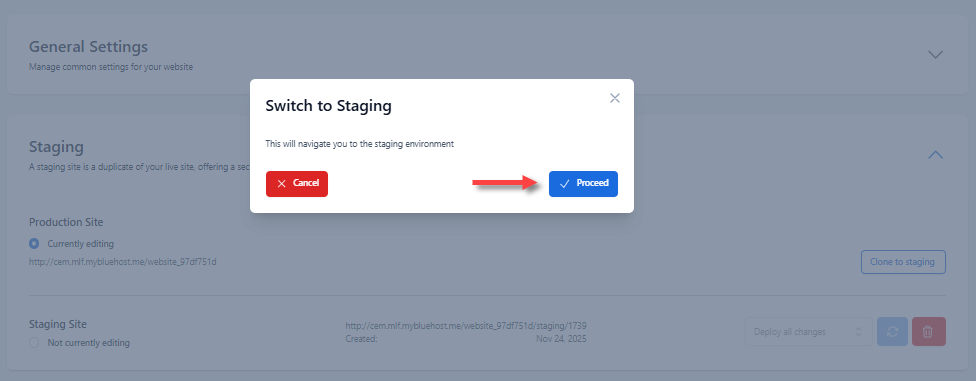
- Select the "Not currently editing" option under the Staging Site section to switch to the staging environment.
- In the pop-up, click Proceed.
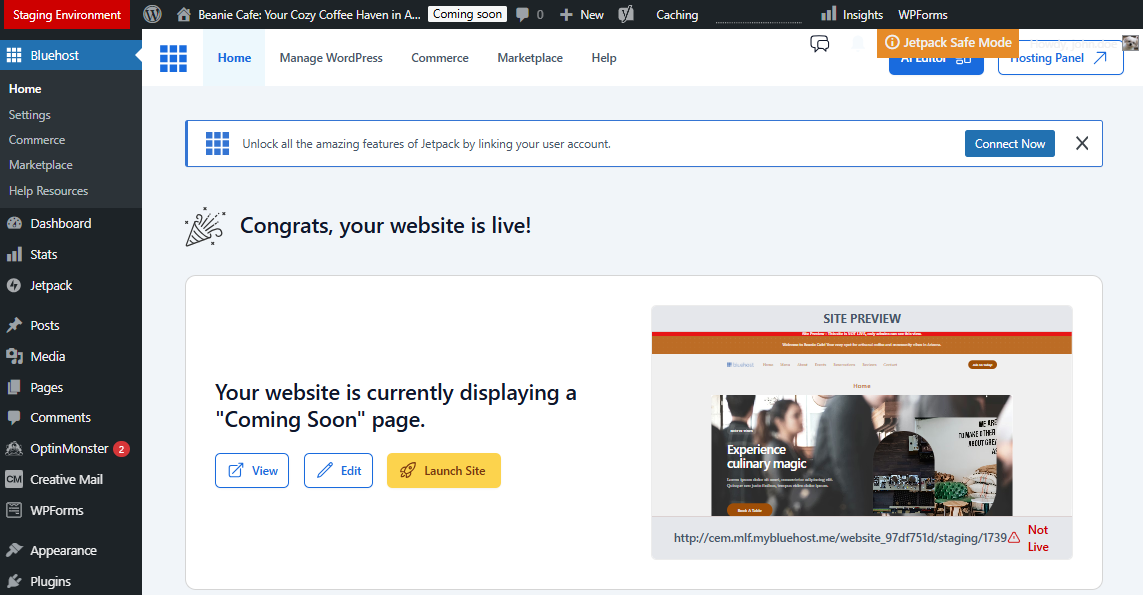
- After switching, you will see the status "Staging Environment" in the top-left corner of your dashboard. You can now proceed with the updates and testing on your website.
- When you're ready to show the changes from the staging site to your live website, navigate back to the Bluehost plugin's Manage WordPress tab.
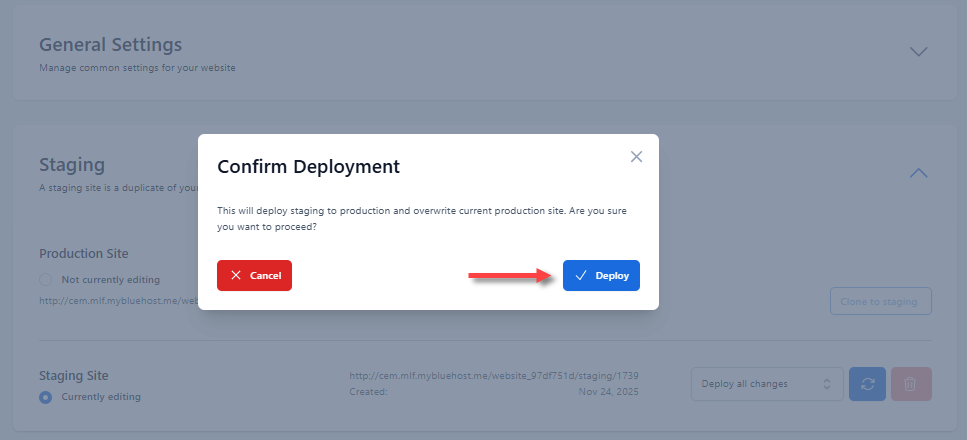
- In the Staging Site section, select your preferred type of deployment in the dropdown, then click the Deploy Site button next to it.
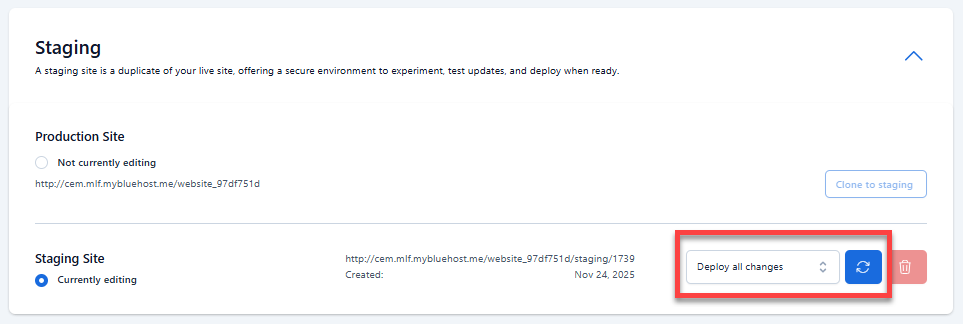
- In the pop-up, click Deploy to proceed.
- Your staging site will start deploying to the live site. The length of this process depends on the size of your website.
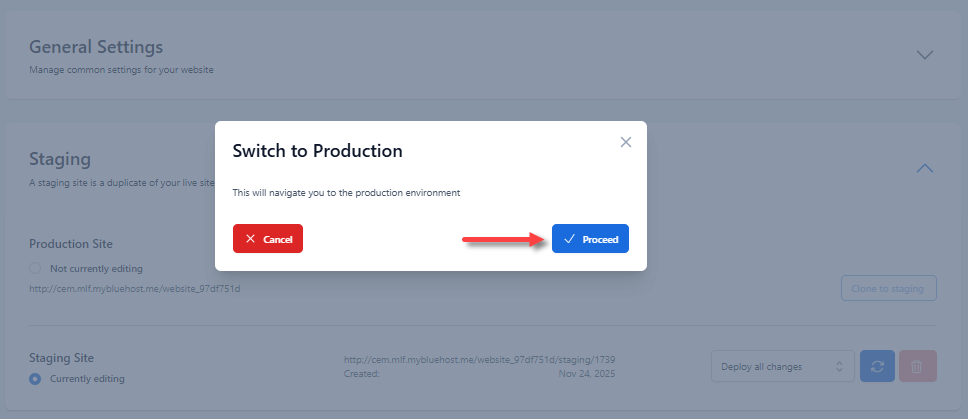
- Once the deployment is complete, you can switch back to your live site. Select the "Production Site" option, then click Proceed.
- Refresh your website to view the changes.
How to Clone Your Live Site to a Staging Site
When you switch back to your production site, please note that any changes you make to the live site will NOT automatically sync to your staging website.
If you want to test additional features on your staging site in the future, you will need to clone your live site to the staging environment.
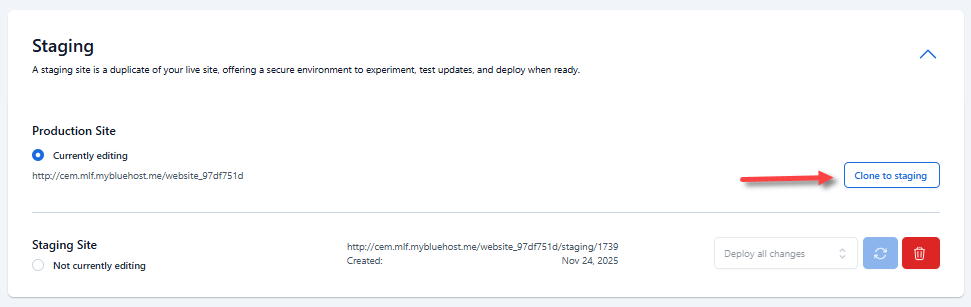
- Under the Manage WordPress tab, click the Clone to Staging button in the Production Site section.
- Again, give it a moment to clone your live site to the staging environment.
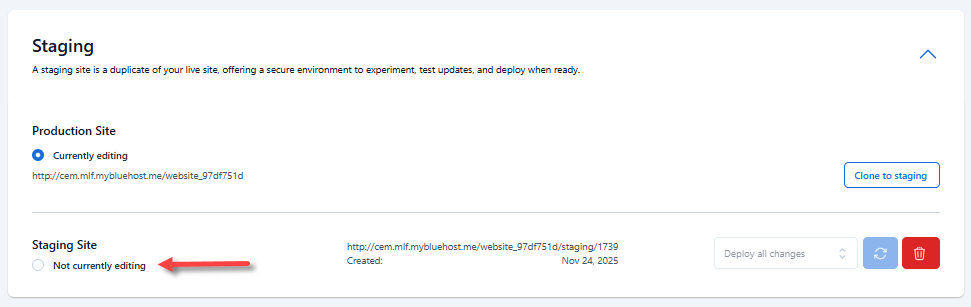
- Then, select the "Not currently editing" option in the Staging Site section to switch.
Summary
Establishing a staging site on WordPress is crucial for testing changes before they go live. By following the step-by-step instructions provided, you can effectively manage website updates while minimizing errors and ensuring your website goes live smoothly.
As you control upgrades and prevent errors, creating a staging site becomes an essential practice for maintaining a professional and reliable online presence. Partnered with Bluehost's WordPress hosting, you can push your website to new levels of success.
If you need further assistance, feel free to contact us via Chat or Phone:
- Chat Support - While on our website, you should see a CHAT bubble in the bottom right-hand corner of the page. Click anywhere on the bubble to begin a chat session.
- Phone Support -
- US: 888-401-4678
- International: +1 801-765-9400
You may also refer to our Knowledge Base articles to help answer common questions and guide you through various setup, configuration, and troubleshooting steps.