How to Create Custom Menus in WordPress
Want to give your website visitors a smoother, more intuitive experience? Learning how to create custom menus in WordPress is key. It's easier than you might think, and we'll walk you through it step by step.
What is a Custom Menu?
A custom menu in WordPress is a list of links designed to assist visitors in navigating the website more effectively. It is typically located in a prominent location, such as the header, footer, or sidebar of the website.
With custom menus, you can arrange and select which pages, posts, categories, and custom links to feature on your website. You also have full control over the order of the links and how they are labeled on your site.
Here are the topics discussed in this article.
How to Create Custom Menus
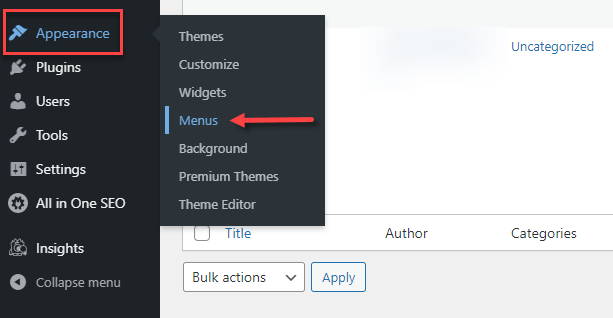
- Log in to your WordPress Admin dashboard.
- Click Appearance on the left-side menu, then click Menus.
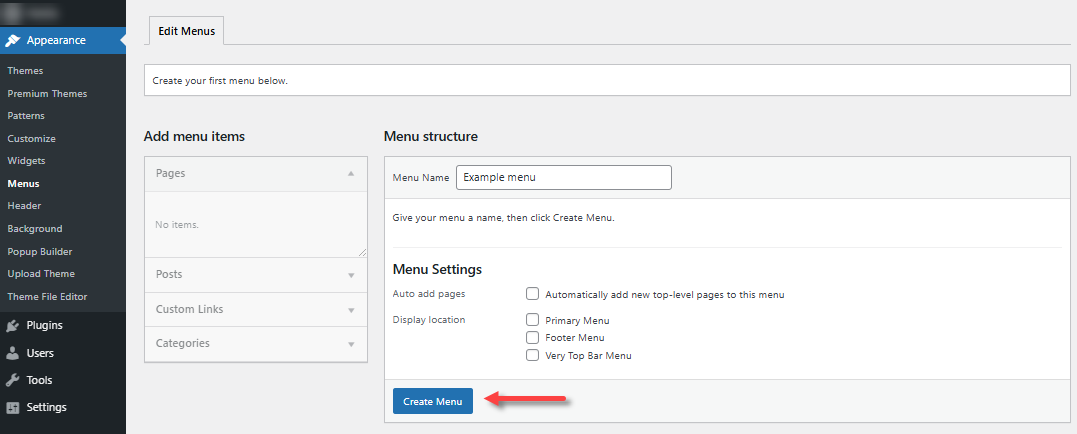
- In the Menu structure section, enter a name for your new menu and select which location you want your custom menu to appear in. Click Create Menu.
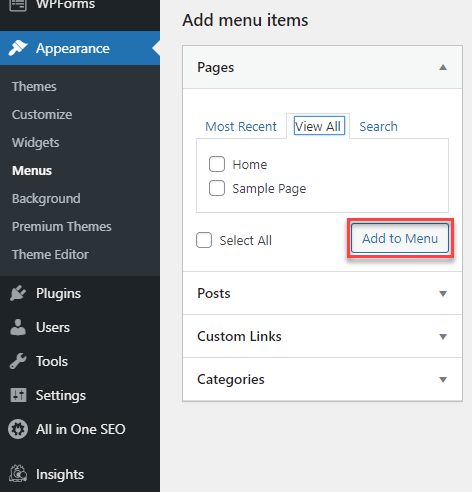
- Under Add menu items, choose the items you want to add to the menu. Click the View All tab to see all the pages. You can add posts, custom links, categories, and formats. Once done, click Add to Menu.
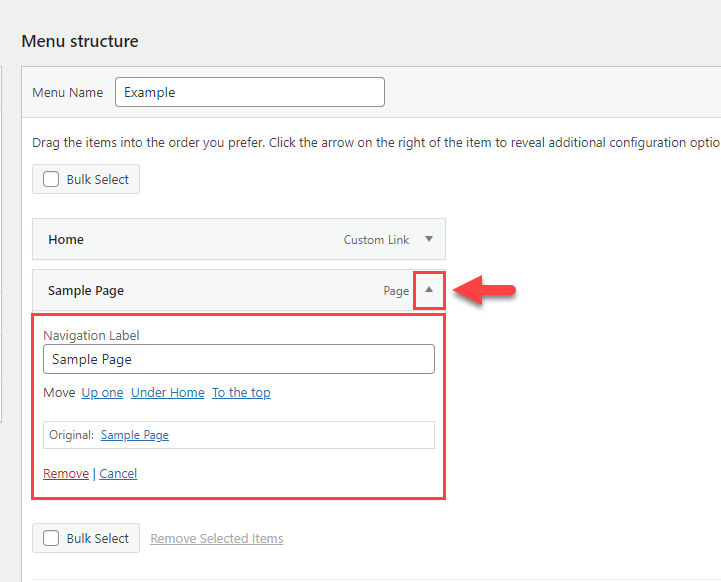
- After you have included pages in your menu, you can rearrange them by dragging and dropping each page to your preferred order of appearance.
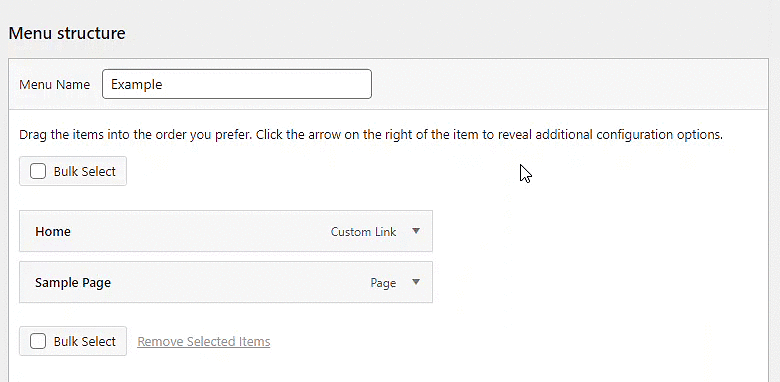
- You can edit the page information by clicking the arrow to change the Navigation Label or Remove the page from the menu.
- You can also modify the Menu Settings.
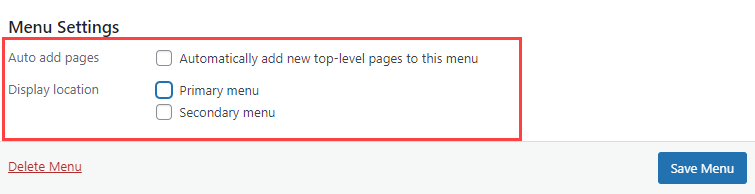
- Click on the Save Menu button.
Alternative Way to Create a Custom Menu in WordPress
You can also create a custom menu through the Widgets section in WordPress.
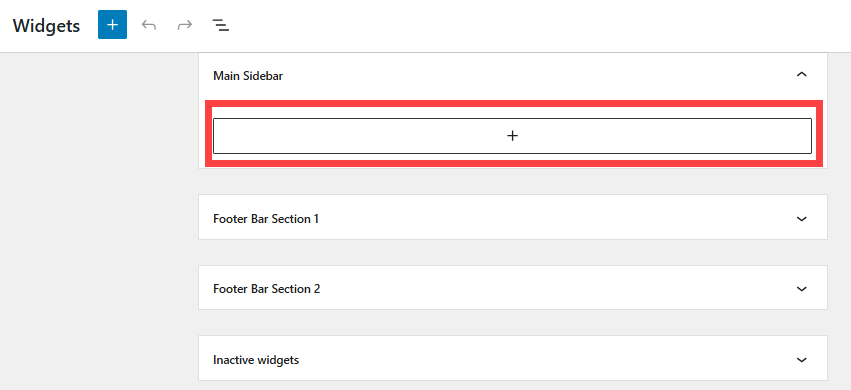
- Within the WordPress dashboard, click Appearance in the left-side menu, then select Widgets.

- Click the block "+" icon where you want to add the menu (for example: Main sidebar or footer bar).
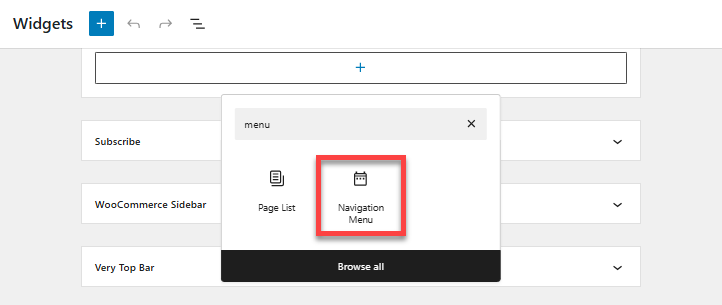
- Click Browse all.
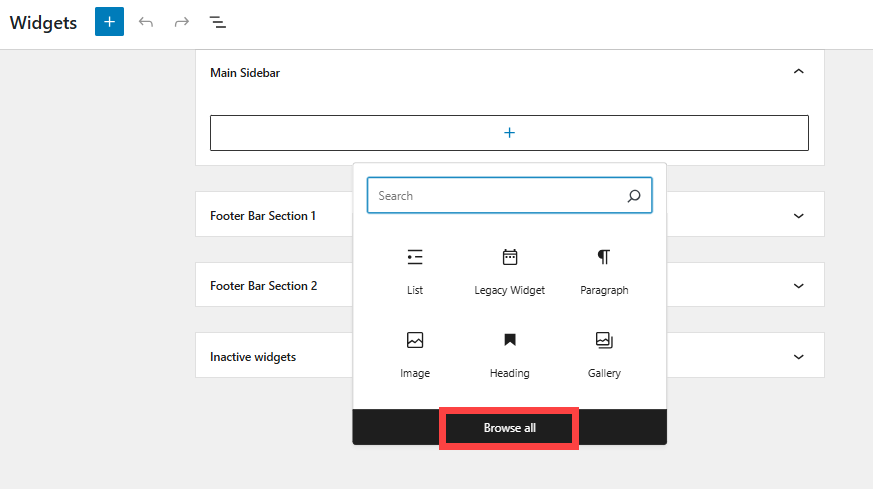
- In the search field, type "menu" and select Navigation Menu.
- Under the Navigation Menu, type the Title of your menu, and choose the menu you want to add in the Select Menu dropdown.
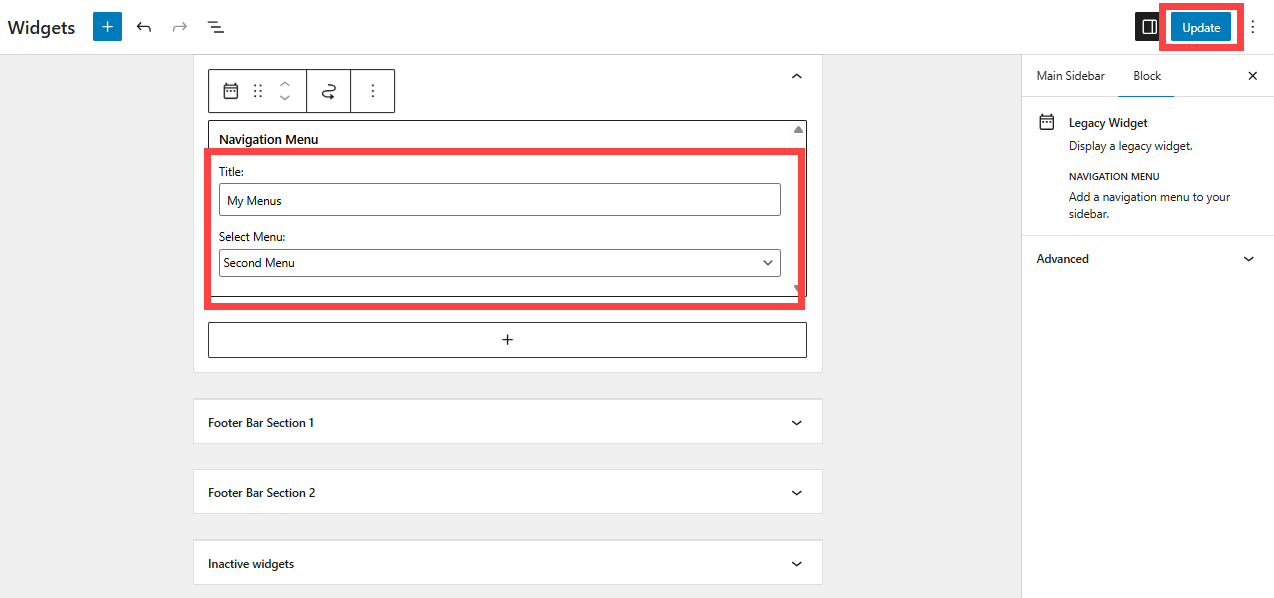
- Click Update in the top-right corner to save your menu.
Summary
Creating custom menus in WordPress is a simple but powerful way to enhance your website's navigation and user experience. This article walks you through the steps to build and manage custom menus via the WordPress dashboad and widgets, allowing you to organize pages, categories, and links exactly how you want them to look on your website. So go ahead, give it a try, and see the difference it can make for your visitors.
If you need further assistance, feel free to contact us via Chat or Phone:
- Chat Support - While on our website, you should see a CHAT bubble in the bottom right-hand corner of the page. Click anywhere on the bubble to begin a chat session.
- Phone Support -
- US: 888-401-4678
- International: +1 801-765-9400
You may also refer to our Knowledge Base articles to help answer common questions and guide you through various setup, configuration, and troubleshooting steps.