How to Sign Up for an Account at Bluehost
Choosing the right web hosting service is crucial for launching a successful website. Bluehost is one of the most popular and reliable hosting providers, especially for Shared hosting — an affordable solution ideal for individuals, small businesses, and bloggers. This guide will walk you through the steps to purchase a Shared hosting service with Bluehost.
- Why Choose Bluehost Shared Hosting?
- Step 1: Visit the Bluehost Website
- Step 2: Choose Your Shared Hosting Plan
- Step 3: Register or Use an Existing Domain
- Step 4: Create Your Bluehost Account
- Step 5: Choose Your Recommended Addons
- Step 6: Enter Your Billing Information
- Step 7: Select Your Billing Term
- Step 8: Choose Your Data Center Location
- Step 9: Review Your Cart and Submit Payment
- Step 10: Access Your Bluehost Portal
- Summary
- Related Articles
We have created a video guide to walk you through the steps.
Why Choose Bluehost Shared Hosting?
Bluehost provides great functionality, support, and easy-to-use tools to make developing and managing your site a simple process. The shared web hosting packages from Bluehost include:
- Free domain registration (for the first year)
- 24/7 customer support (for Business plan and above)
- Free SSL certificate
- One-click WordPress installation
- Unmetered bandwidth
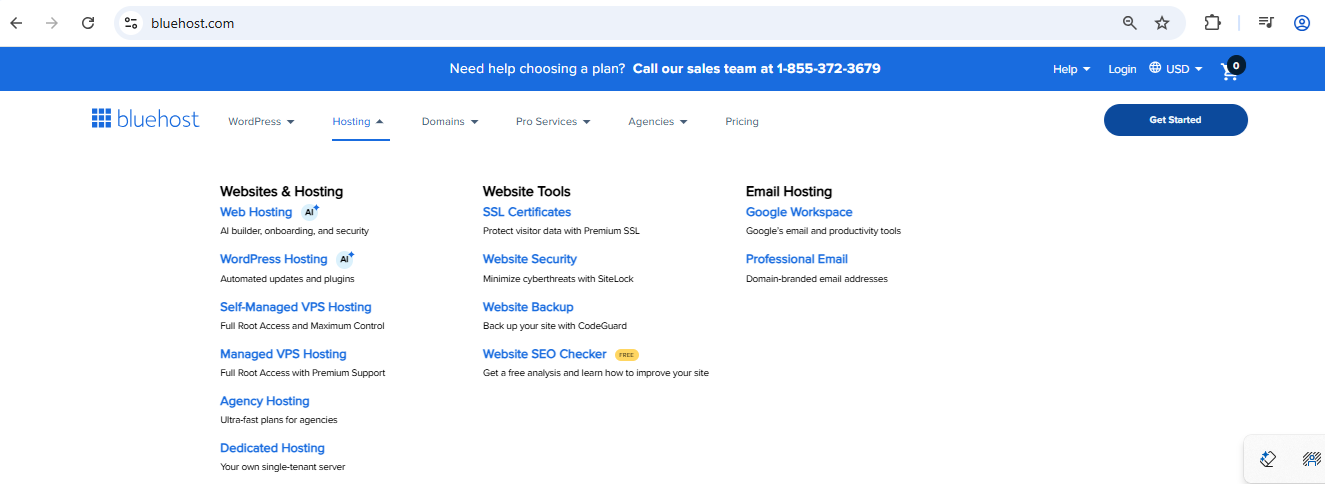
Step 1: Visit the Bluehost Website
Head over to Bluehost.com. From the homepage, click on the Hosting tab, then select Web Hosting to view available plans.
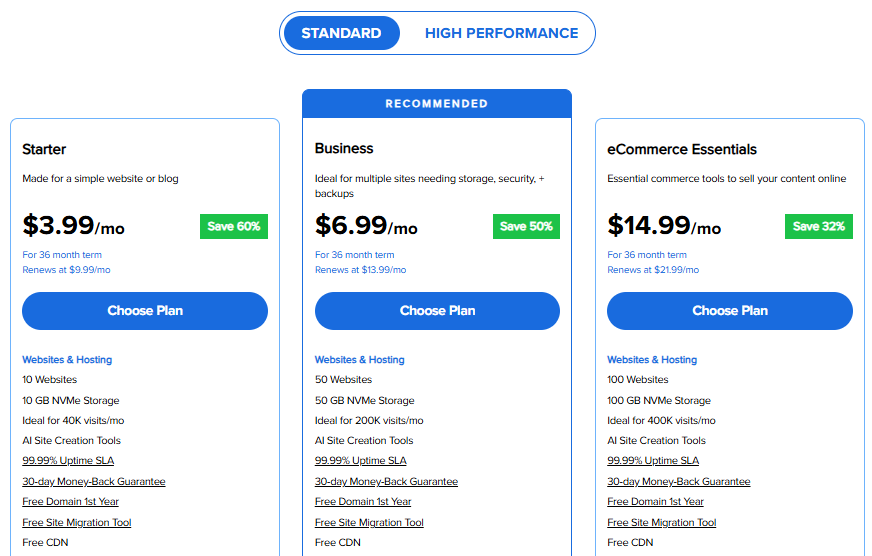
Step 2: Choose Your Shared Hosting Plan
Bluehost offers multiple Shared hosting plans tailored to different needs. Pick the plan that suits your website’s needs and budget. For most new websites, the Starter or Business plans are sufficient.
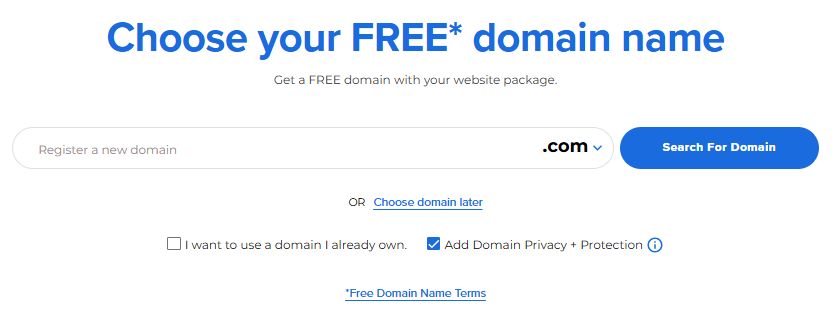
Step 3: Register or Use an Existing Domain
Choose a domain name for your website. You can either register a new domain or register a new one, and then add Domain Privacy + Protection. You can also select your domain at a later time, if you prefer.
Bluehost also offers free domain registration for one year if you purchase a Shared hosting plan.
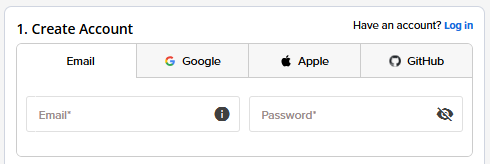
Step 4: Create Your Bluehost Account
To proceed, create your Bluehost account with your email address and password. You can also link your account directly to Google, Apple, or GitHub — whichever you prefer! Just follow the prompts, set a secure password, and you’ll be ready to access your Bluehost Portal.
Step 5: Choose Your Recommended Addons
Bluehost offers a variety of recommended addons for your website:
- CodeGuard: Provides daily backups to protect your site data.
- eCommerce: Tools to set up and manage an online store easily.
- Yoast: A powerful plugin to help improve your website’s SEO.

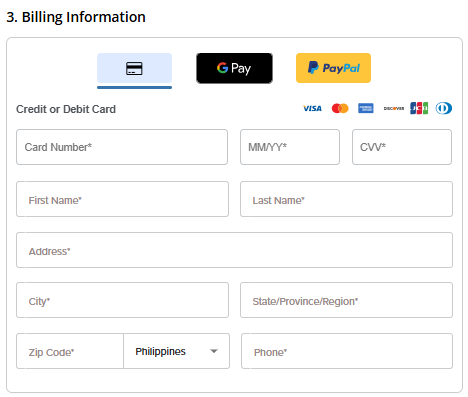
Step 6: Enter Your Billing Information
Enter your payment details in the Billing Information section and select your preferred payment method. You can pay using a credit card, a debit card, Google Pay, or PayPal for your convenience.
Step 7: Select Your Billing Term
Choose your billing term from the dropdown menu. Bluehost offers flexible term lengths. Selecting a longer term can provide better pricing and savings.
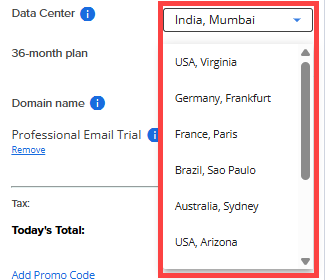
Step 8: Choose Your Data Center Location
One important choice during the purchase process is selecting your Data Center.
A data center is a physical facility that houses the servers storing your website’s files and data. The data center location you choose affects how quickly visitors around the world can access your website. Selecting a data center closest to your primary audience reduces latency, improves load times, and enhances overall user experience.
Bluehost offers data centers in the following locations:
- Australia, Sydney
- Brazil, Sao Paulo
- Canada, Toronto
- France, Paris
- Germany, Frankfurt
- India, Mumbai
- Spain, Madrid
- UK, London
- USA, Arizona
- USA, Virginia
Choose the data center that is geographically closest to your main visitor base to optimize website speed and reliability.
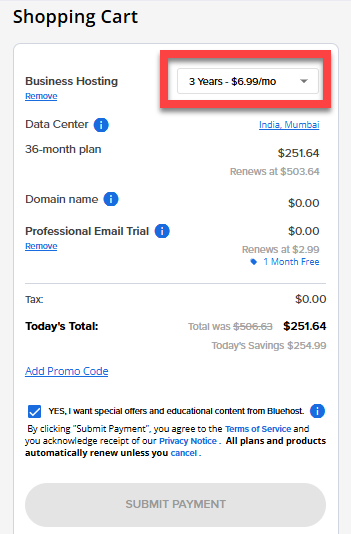
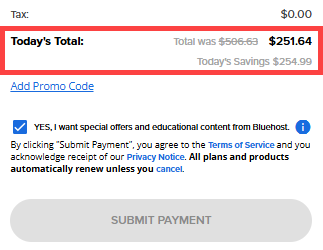
Step 9: Review Your Cart and Submit Payment
Review the items in your Shopping Cart, double-check your Data Center, addons, and billing term. Click the Submit Payment button to complete the purchase.
Step 10: Access Your Bluehost Portal
Once your payment has been processed, you will receive an order confirmation email from Bluehost with information about your account.
You can access and manage your Bluehost account by logging in through the Bluehost.com website or by visiting the Bluehost login page using this link: https://www.bluehost.com/my-account/login. For further instructions, visit the How to Log into the Bluehost Portal article.
Summary
Buying shared hosting on Bluehost is pretty straightforward and equips you with the necessary tools to get your site up and running. Choosing the right hosting plan, picking the data center that suits you best, and choosing some useful extras can make a world of difference for your website's performance and load time for your target audience. Efficient, easy-to-use features through Bluehost ensure that launching and managing your website will be a breeze.
Related Articles
- Compare Shared Web Hosting Plans and Cost
- Choosing the Right Hosting Type from the Right Hosting Platform
- Domain vs. Hosting
- How to Renew Hosting
- How to Upgrade a Bluehost Hosting Plan
- How to Log in to the Bluehost Portal
If you need further assistance, feel free to contact us via Chat or Phone:
- Chat Support - While on our website, you should see a CHAT bubble in the bottom right-hand corner of the page. Click anywhere on the bubble to begin a chat session.
- Phone Support -
- US: 888-401-4678
- International: +1 801-765-9400
You may also refer to our Knowledge Base articles to help answer common questions and guide you through various setup, configuration, and troubleshooting steps.